¶ Auxiliary structure
¶ Manual Support
Software that supports manual creation of supports allows you to create supports that better meet your printing needs. By manually creating supports, you can:
- Improve Print Quality: Manual supports ensure that support structures are placed where they are most needed, reducing potential overhangs during printing and preventing print deformation or failure.
- Flexibility: Automatically generated support structures may sometimes be inaccurate or irrational. By adding supports manually, you can better control the placement and quantity of supports to accommodate specific geometries or particular printing requirements.
- Reduce Material Waste: Manual supports can optimize the support structure, reducing unnecessary supports, thus saving material and printing time.
- Ease of Post-Processing: Manual supports can be designed to be easier to remove, reducing the difficulty and time required for post-processing, and minimizing damage to the surface of the finished product.
- Complex Model Requirements: For some complex models, automatically generated support structures may not fully cover all necessary areas. Manual support ensures that the model receives adequate support throughout the printing process.
By using manual supports, you can better control the 3D printing process, increase print success rates and quality, and reduce material waste and post-processing work.
¶ Creating Manual Supports
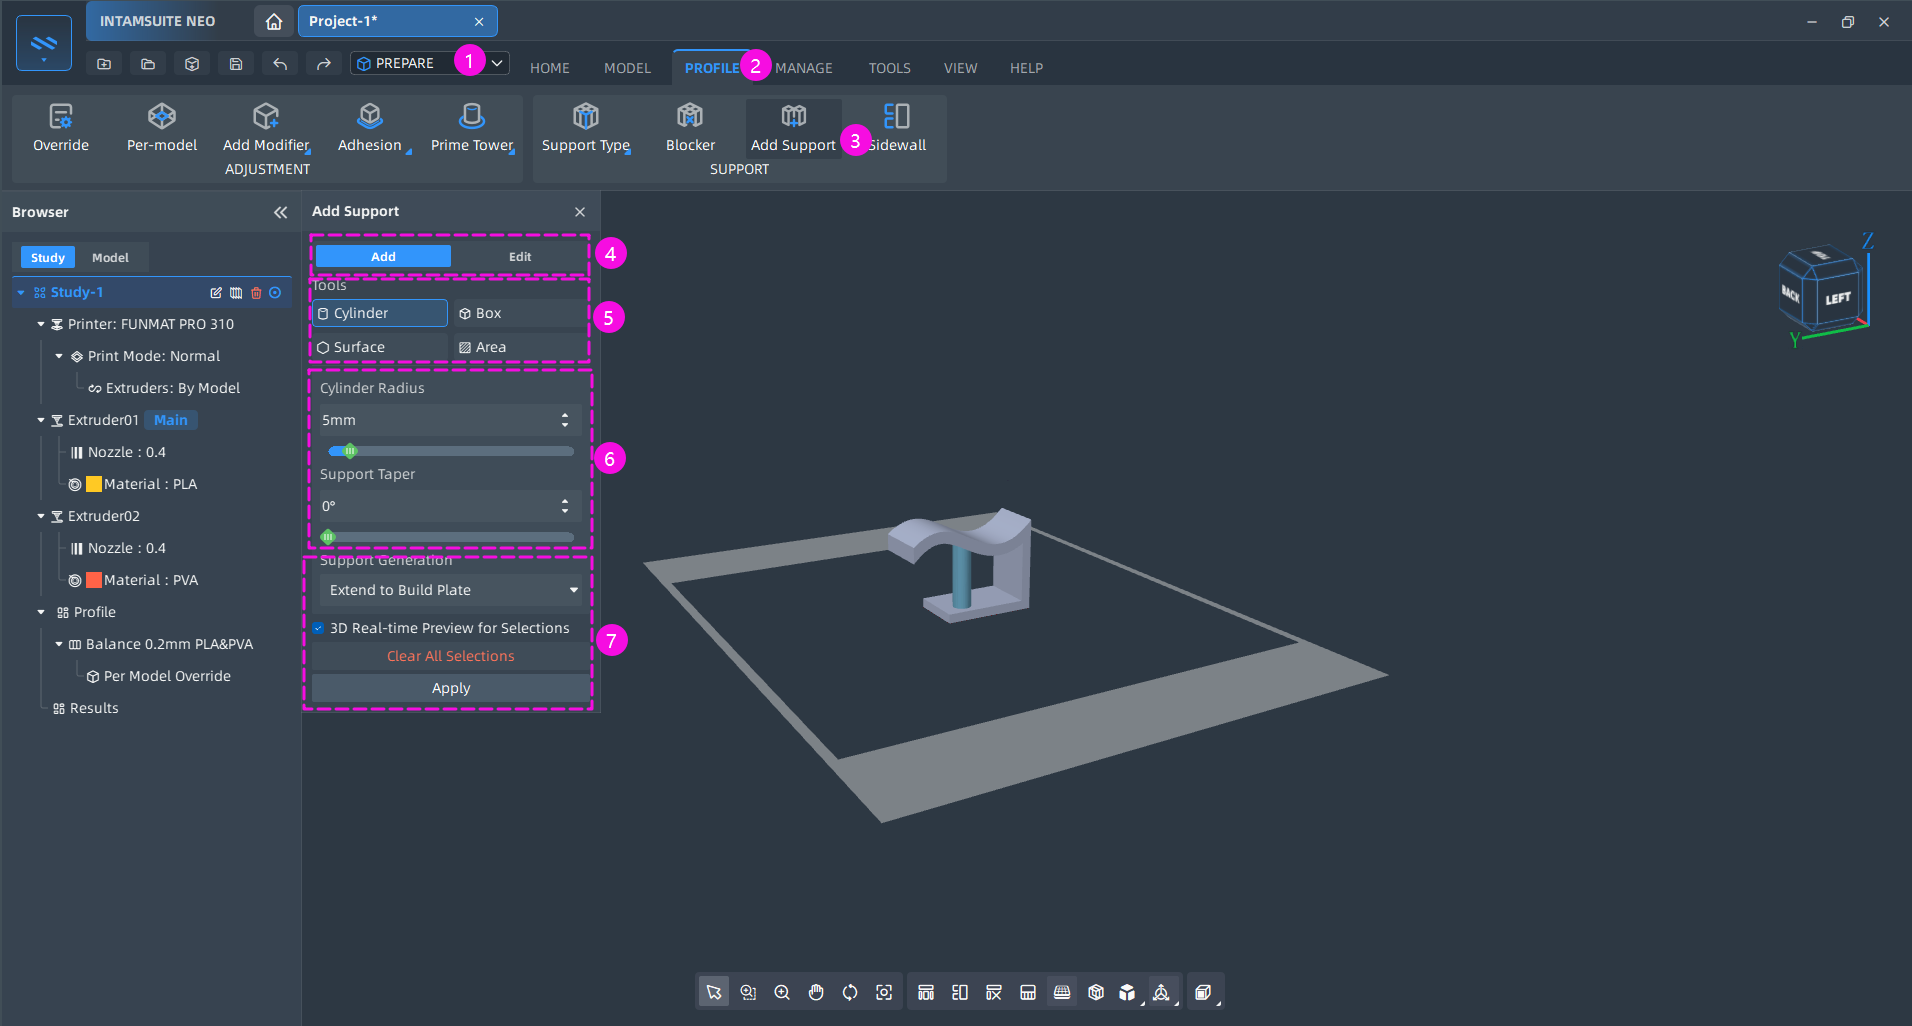
- In the 【Prepare】 environment, click on 【Profile】 to view the 【Add Support】 function.
- Select a model, then click the function to enter the manual support creation mode.
- As shown below, after entering the manual support mode, the surface color of the model will be grayed out to help you better create and view the manual supports.
- The display of the print platform will be turned off by default.
- In this mode, you can choose different tools to create and edit the manual supports you have already created.
- Apply: Creates a preview of the support when applied.

¶ Supported Creation Tools
- Cylinder: Creates a manual support in the form of a cylinder, allowing you to adjust the radius and taper of the cylinder.
- Box: Creates a support in the form of a cuboid, controlled by parameters such as support length, width, taper, and rotation.
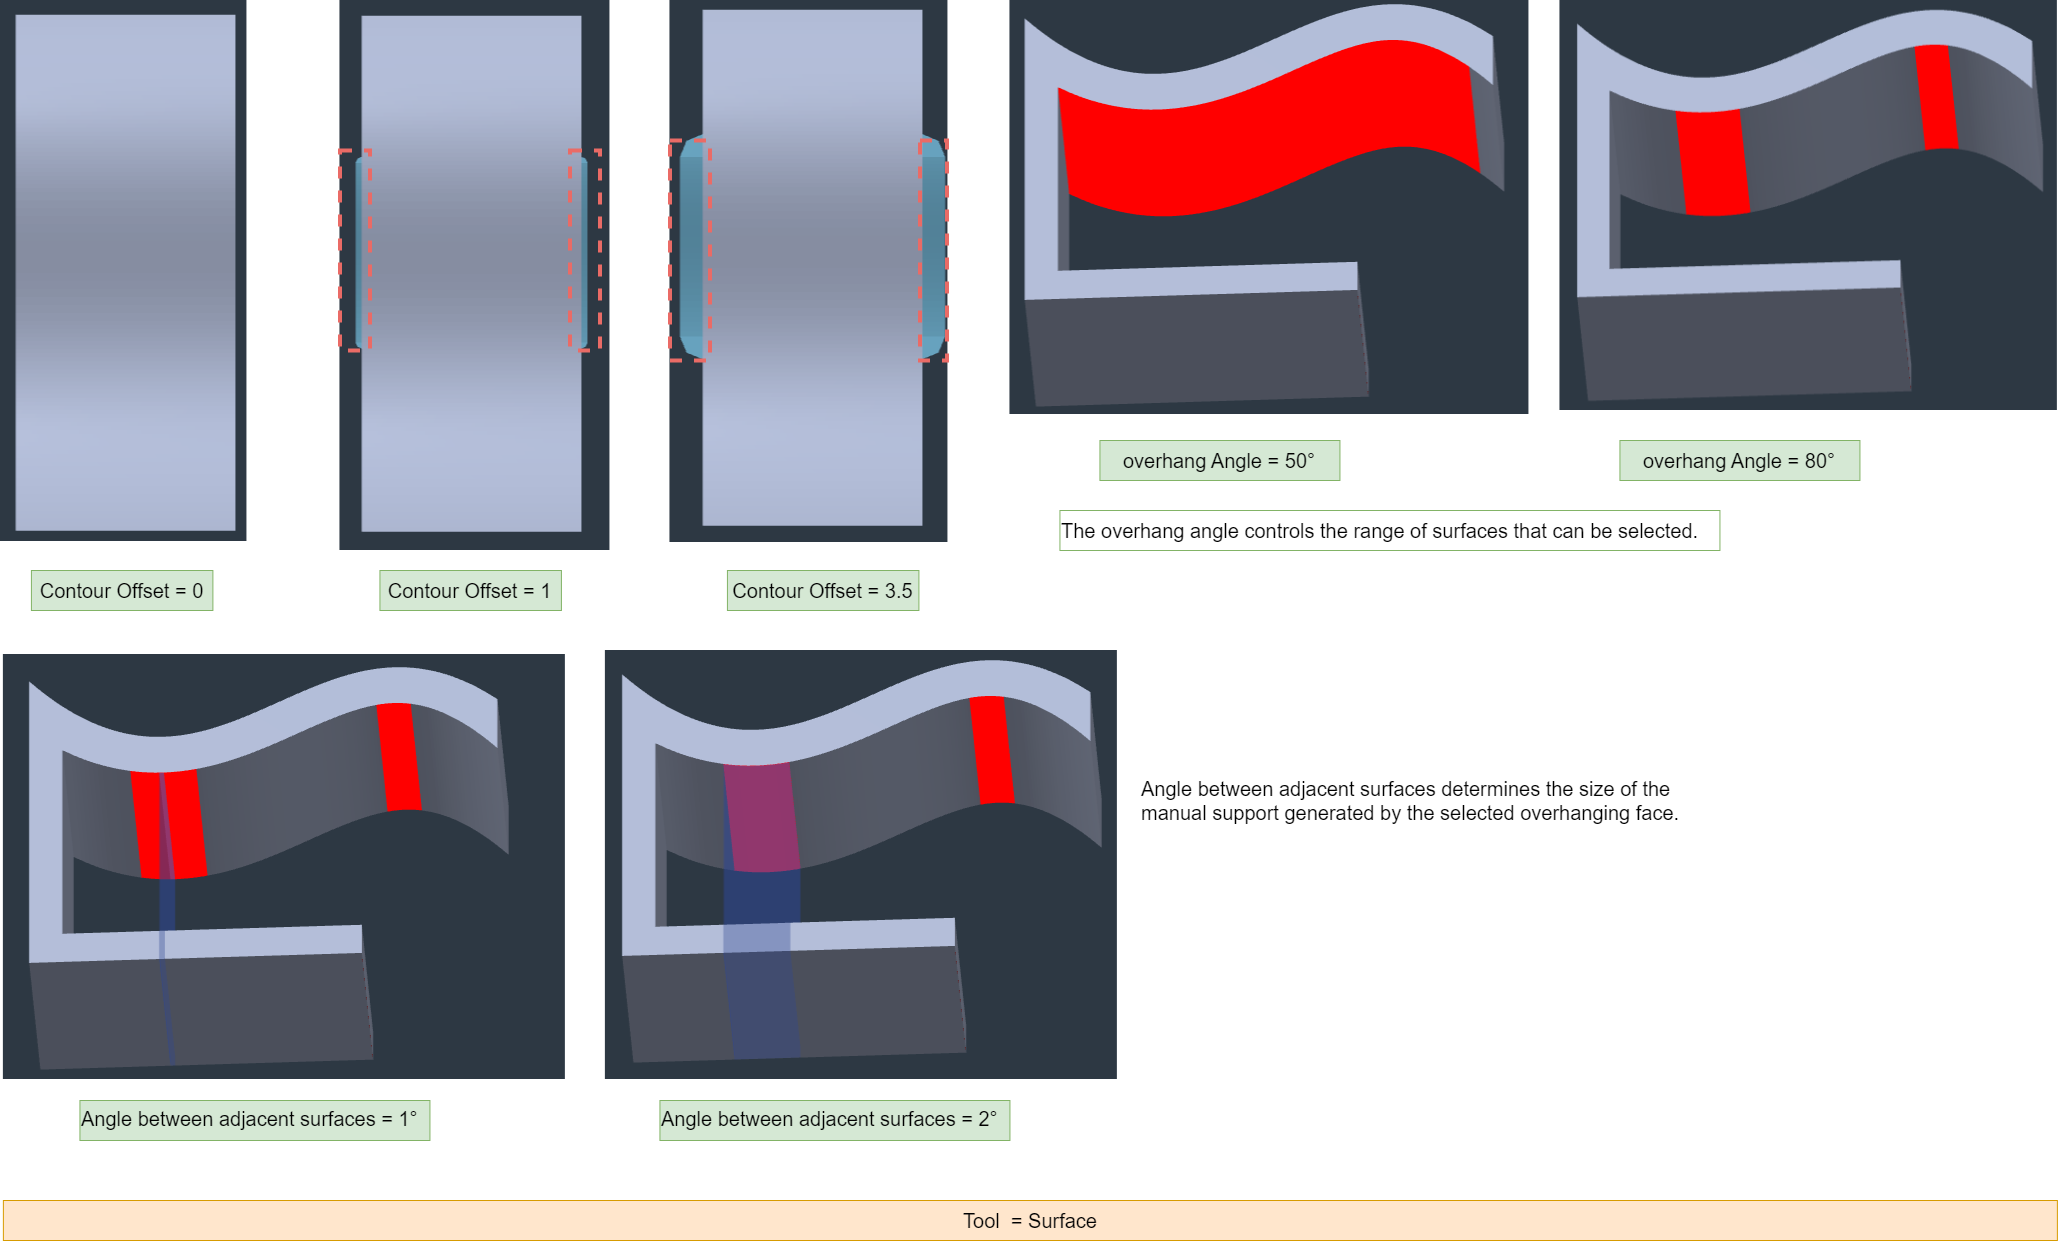
- Surface: Generates manual supports by finding the angle between adjacent surfaces, controlled by parameters like angle between adjacent surfaces, overhang angle, and contour offset.
- Area: Generates supports by controlling the area thickness, support taper, and support contour offset.


¶ Support Generation Method
Currently, the generated supports are defaulted to be generated to the build plate. If the support intersects with the model, the excess support will be processed during slicing.
¶ 3D Real-Time Preview for Selections
You can control whether to enable real-time 3D preview. When enabled, it will show a real-time preview of the manual supports to be generated. Note that if the model mesh is large and the generated supports are complex, enabling 3D real-time preview may impact performance.

¶ Editing Manual Supports
- After creation, you can select manual supports in the Prepare environment, click Add Supports to enter edit mode, and choose to modify or delete supports.
- You can also directly enter manual support creation mode, click Edit to enter the editing mode for manual supports.
- Alternatively, in the Prepare environment, select the manual support, right-click to edit, and enter the manual support editing mode.
¶ Deleting Manual Supports
- Before Apply, hold Ctrl and left-click to select and delete manual supports.
- In edit mode, select the manual support and click Delete Supports to remove the selected support.
- In the Prepare environment, select the manual support, right-click to delete.
¶ Support Types
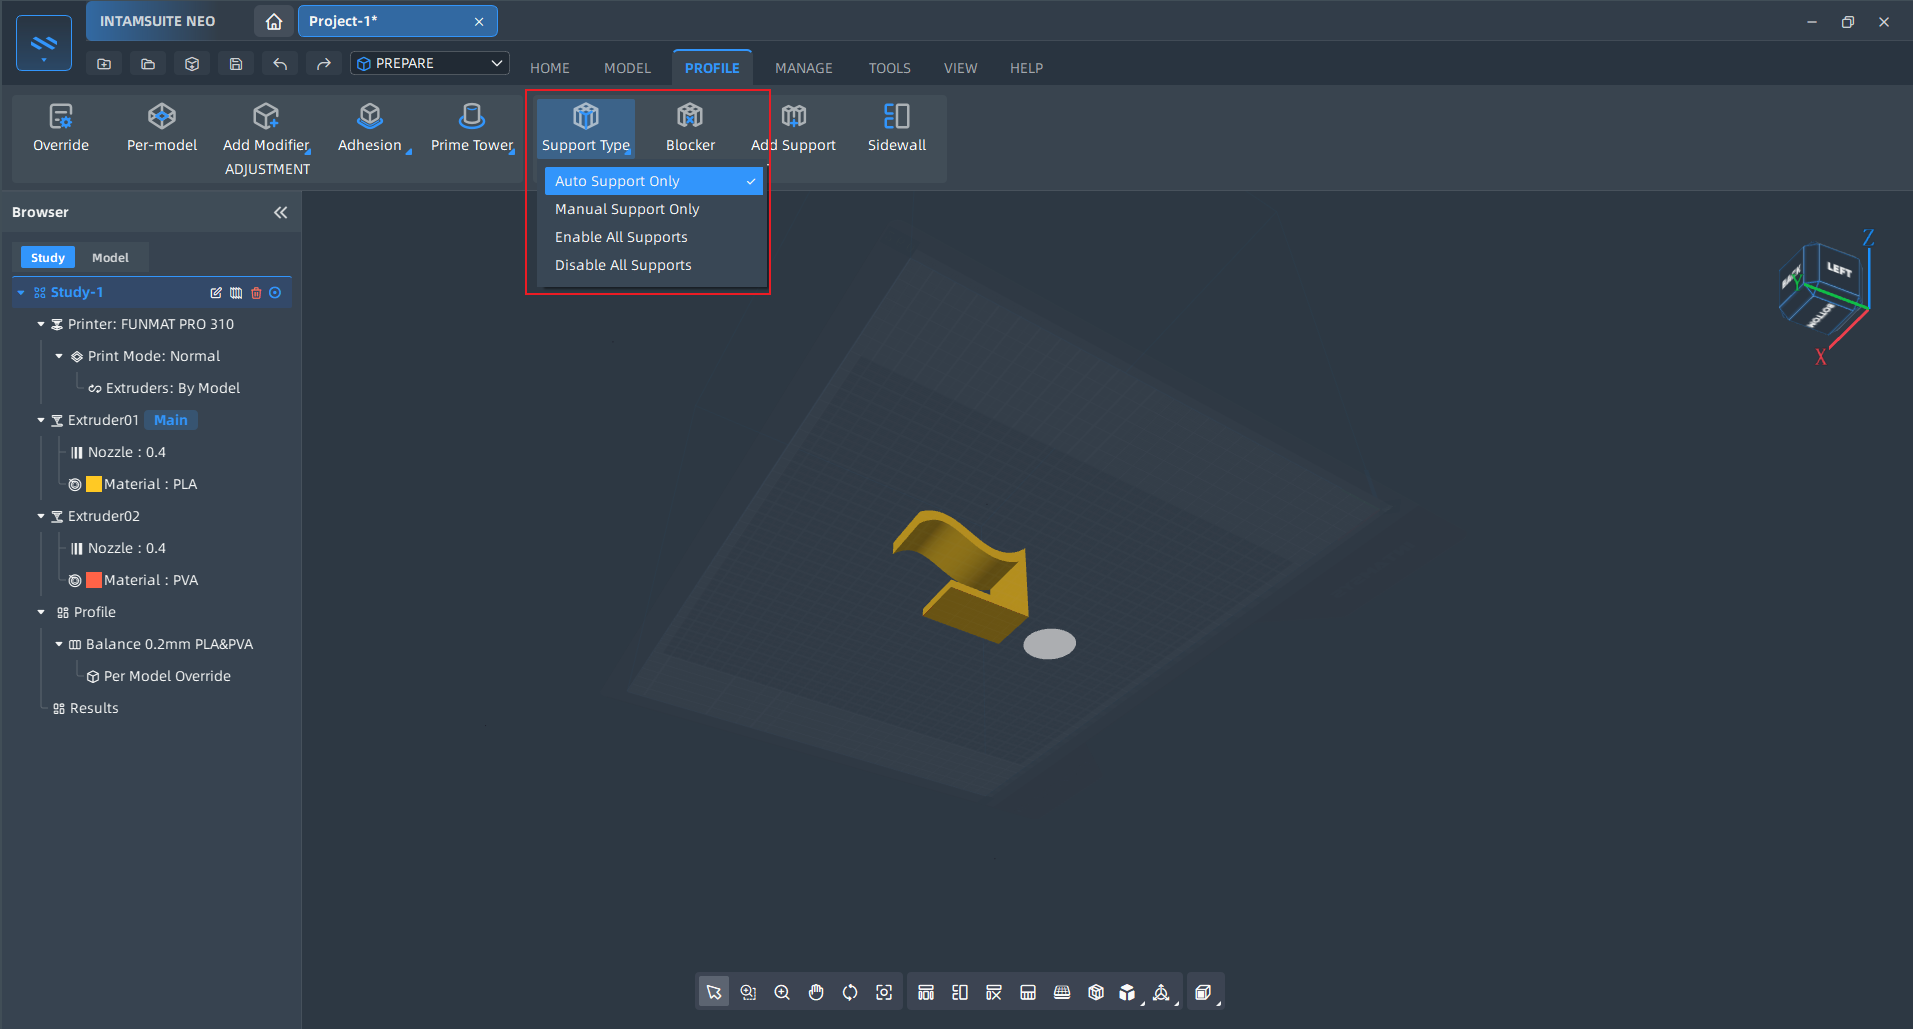
The choice of support type determines the method of support generation during slicing:
- Auto Support Only: Regardless of whether manual supports are created, slicing will generate automatic supports based on the overhang angle for printing.
- Manual Support Only: Slicing will generate supports only based on the created manual supports for printing.
- Enable All Supports: Slicing will generate both automatic supports based on the overhang angle and the created manual supports for printing.
- Disable All Supports: No supports will be generated or printed, regardless of manual supports or overhang angle settings.
