¶ Connect FUNMAT 410/610 to the LAN
¶ Connect via Wi-Fi
(1) On the touch screen, press the Wi-Fi icon and then Connect command
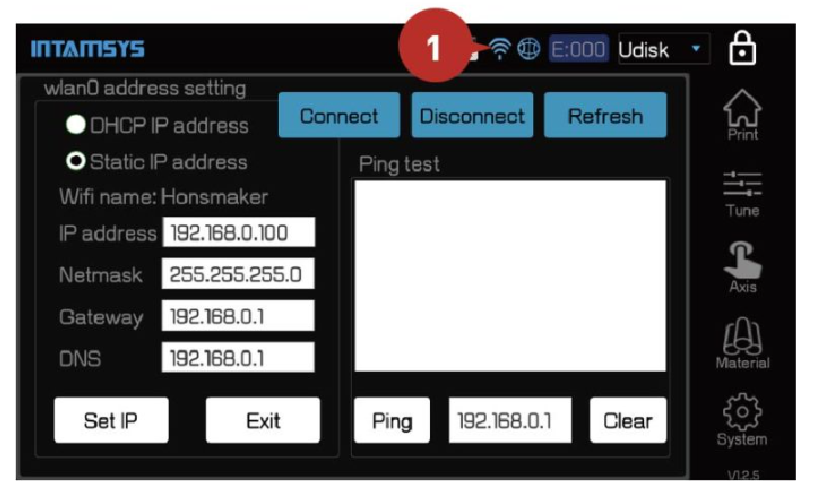
(2) Press Discover button to search for WIFI (refer to the below figure).
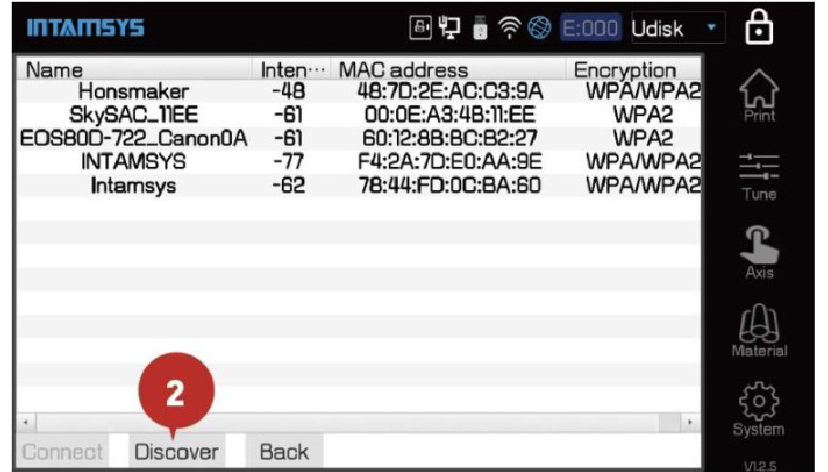
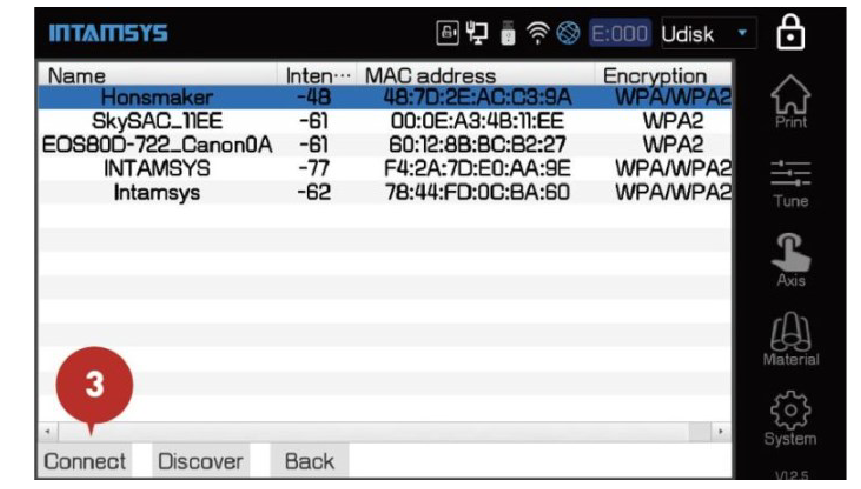
(3) Select WIFI network and press Connect to enter the network.
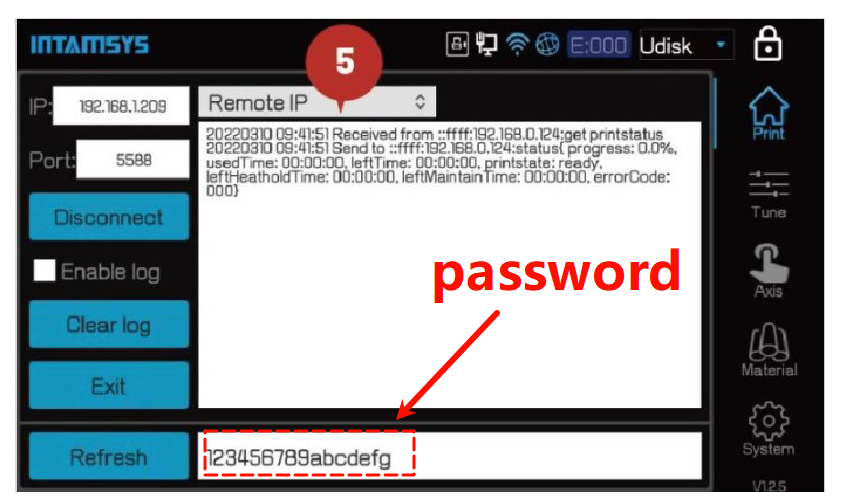
(4) Select Remote icon and enable Listen mode
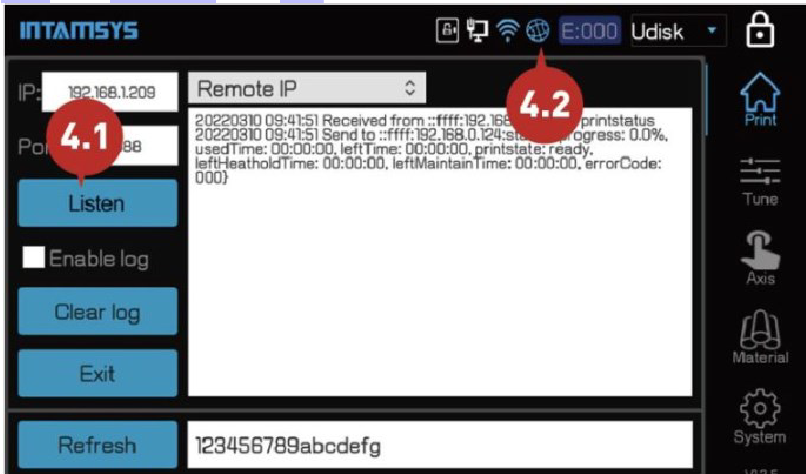
(5) Connect wi-fi and enable LISTEN mode, the machine is ready to connect.
¶ Connecting via Ethernet (LAN)
(1) Plug the Ethernet cable into the Ethernet port on the back of the printer.
(2) If you have previously enabled wi-fi, disconnect the wi-fi network first.
(3) Select the Ethernet icon from the screen and then select Ethernet
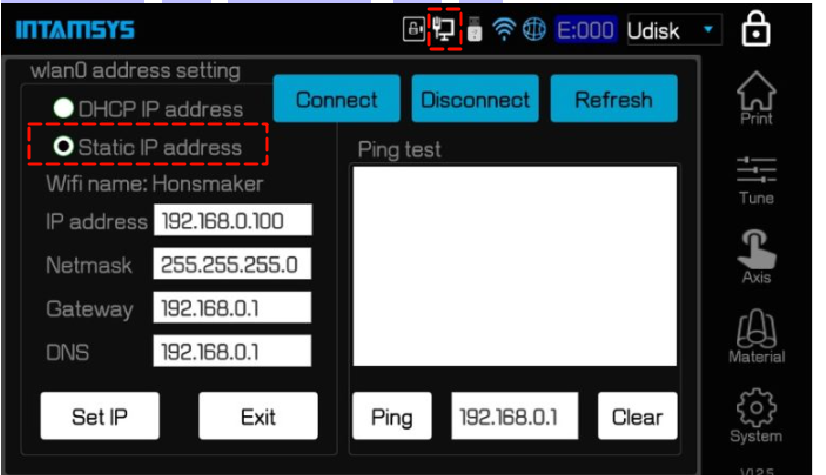
It is recommended that you use Dynamic IP first to obtain an IP, then switch to Static IP to maintain an IP connection.
¶ Remote print
How to start and connect the printer on the Intamsuite NEO is detailed: Start and connect the printer on the Intamsuite NEO.
¶ Connect FUNMAT 310 to the LAN
¶ Connect via Wi-Fi
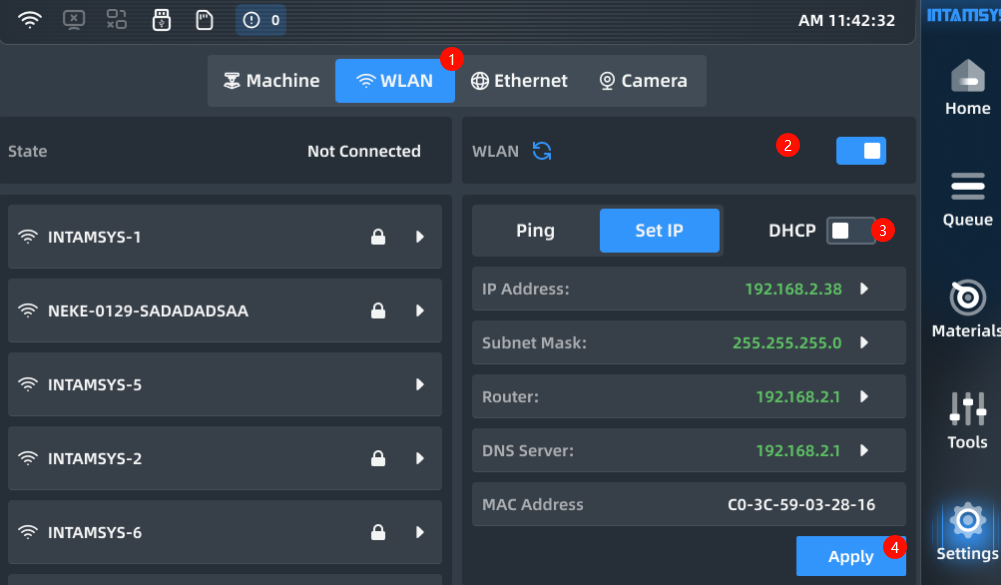
(1) On the touch screen, press the Wi-Fi icon
(2) Enable Wi-Fi
(3)Choose whether or not to enable dynamic IP via DHCP;
(4)Apply
 |
 |
¶ Connecting via Ethernet (LAN)
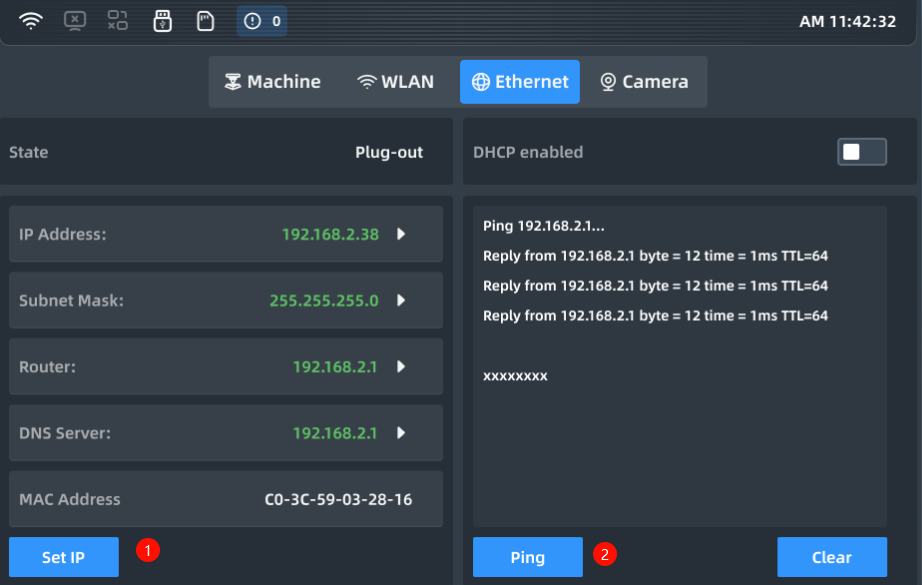
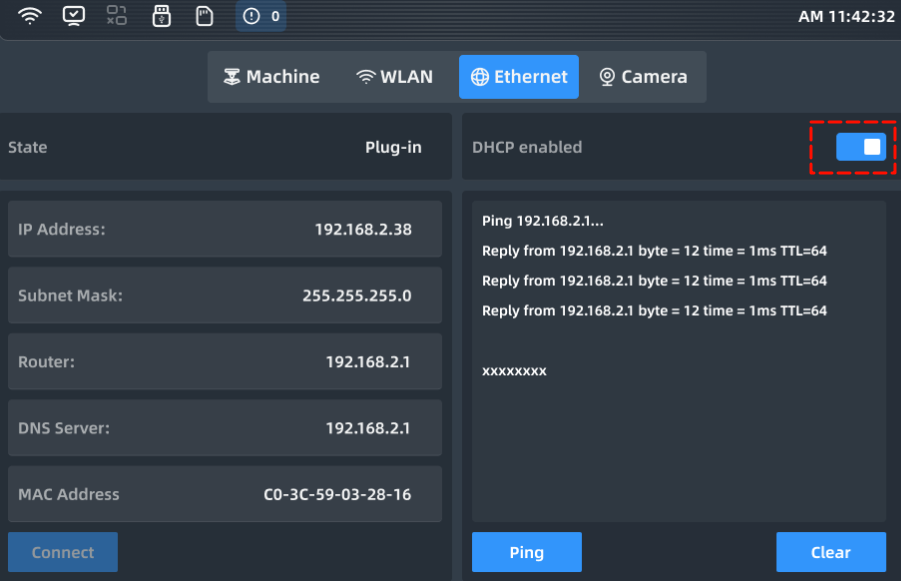
(1)On the touch screen, press the Ethernet icon
(2) press Set IP
(3) ping
(4) Choose whether or not to enable dynamic IP via DHCP
 |
 |
¶ Enable Remote Print
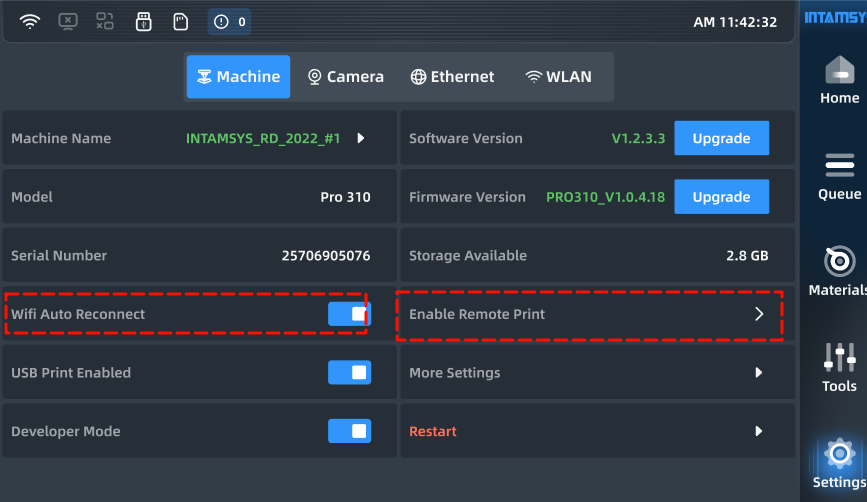
(1) On the touch screen, press the machine icon
(2) press wifi auto Reconnet and Enable Remote Print
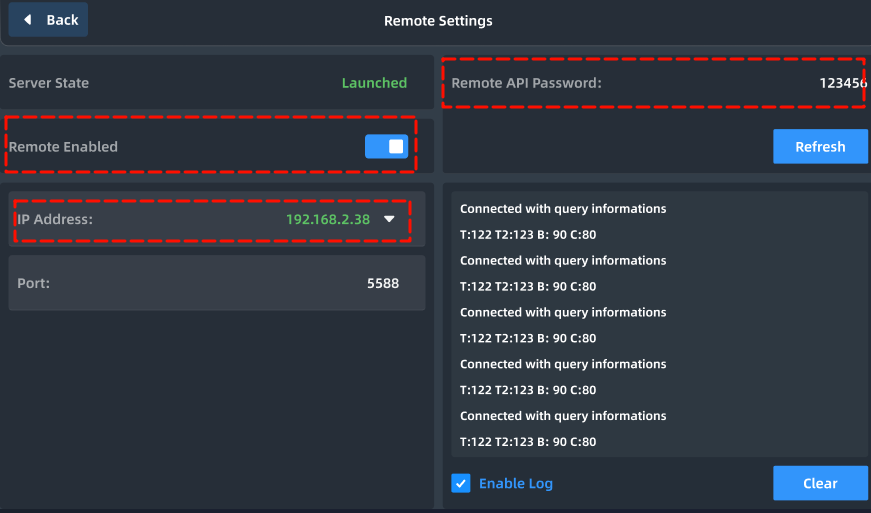
(3) and then go to a new page to set the IP address and refresh password
you need to write down the remote API password and IP address for later use.
 |
 |