¶ Extruder Assembly
¶ Steps:
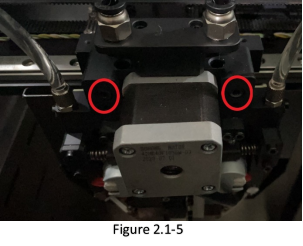
a. Unload the filament and use 2.5mm Allen Key to remove the 2 screws Key in the front cover of extruder Assy, and remove the front cover. Figure 2.1-1
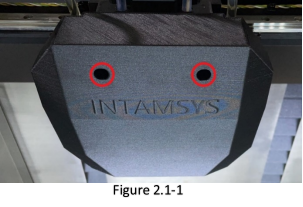
b. Move the Extruder Assy to the center. Press the black collar down by one hand while take out the 2 tubes by the other hand. Figure 2.1-2
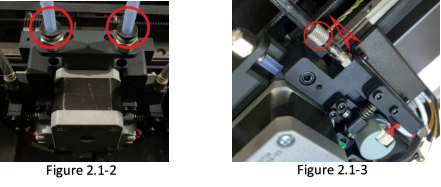
c. Loosen the locking nut of coolant pipe on Extruder Assy by hand or spanner. Unplug the tube directly with wrapping by a wiper to prevent water leakage. Figure 2.1-3 (if all the T is set to “0”, the coolant will be sucked back to chiller)
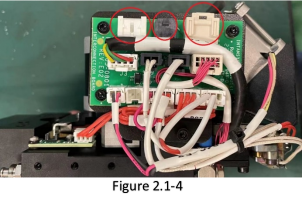
d. Power off the printer, unplug the 3 cables connectors on each left and right interconnection boards. Figure 2.1-4
e. Remove the 2 screws showing in Figure 2.1-5, then take the printhead assembly off.