¶ 1.7 Touch Screen, USB Port & Power on Button
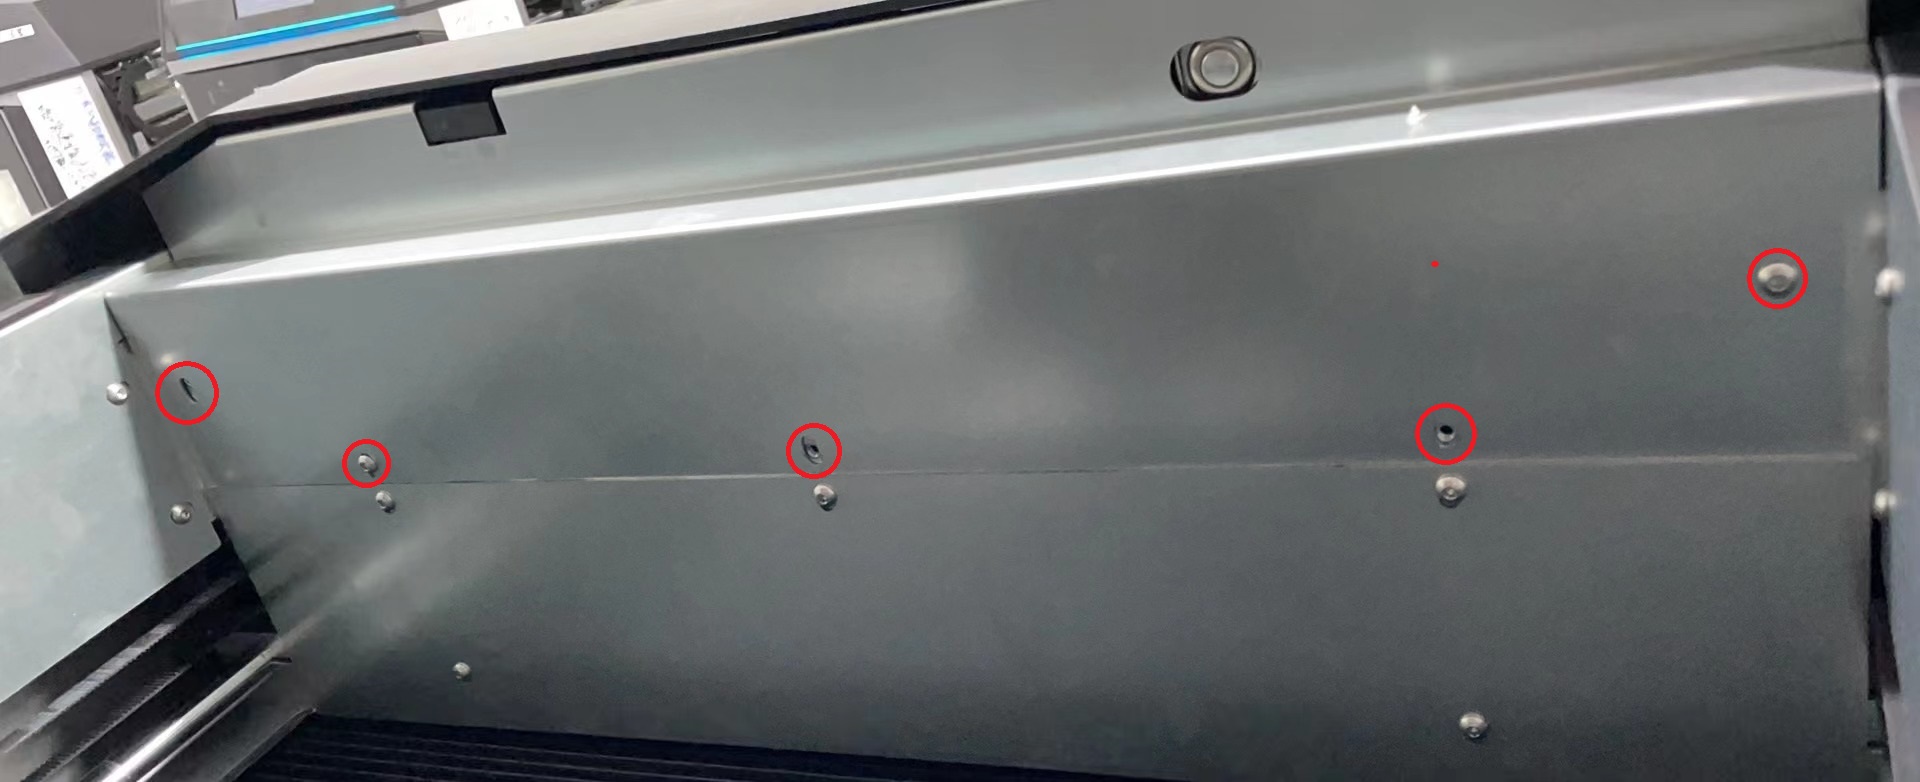
1. Disconnected the main power. Open the top door, remove the 5 screws on the metal plate back of the tough screen with 2mm Allen-Key, and touch screen available. Figure 1.7 - 1

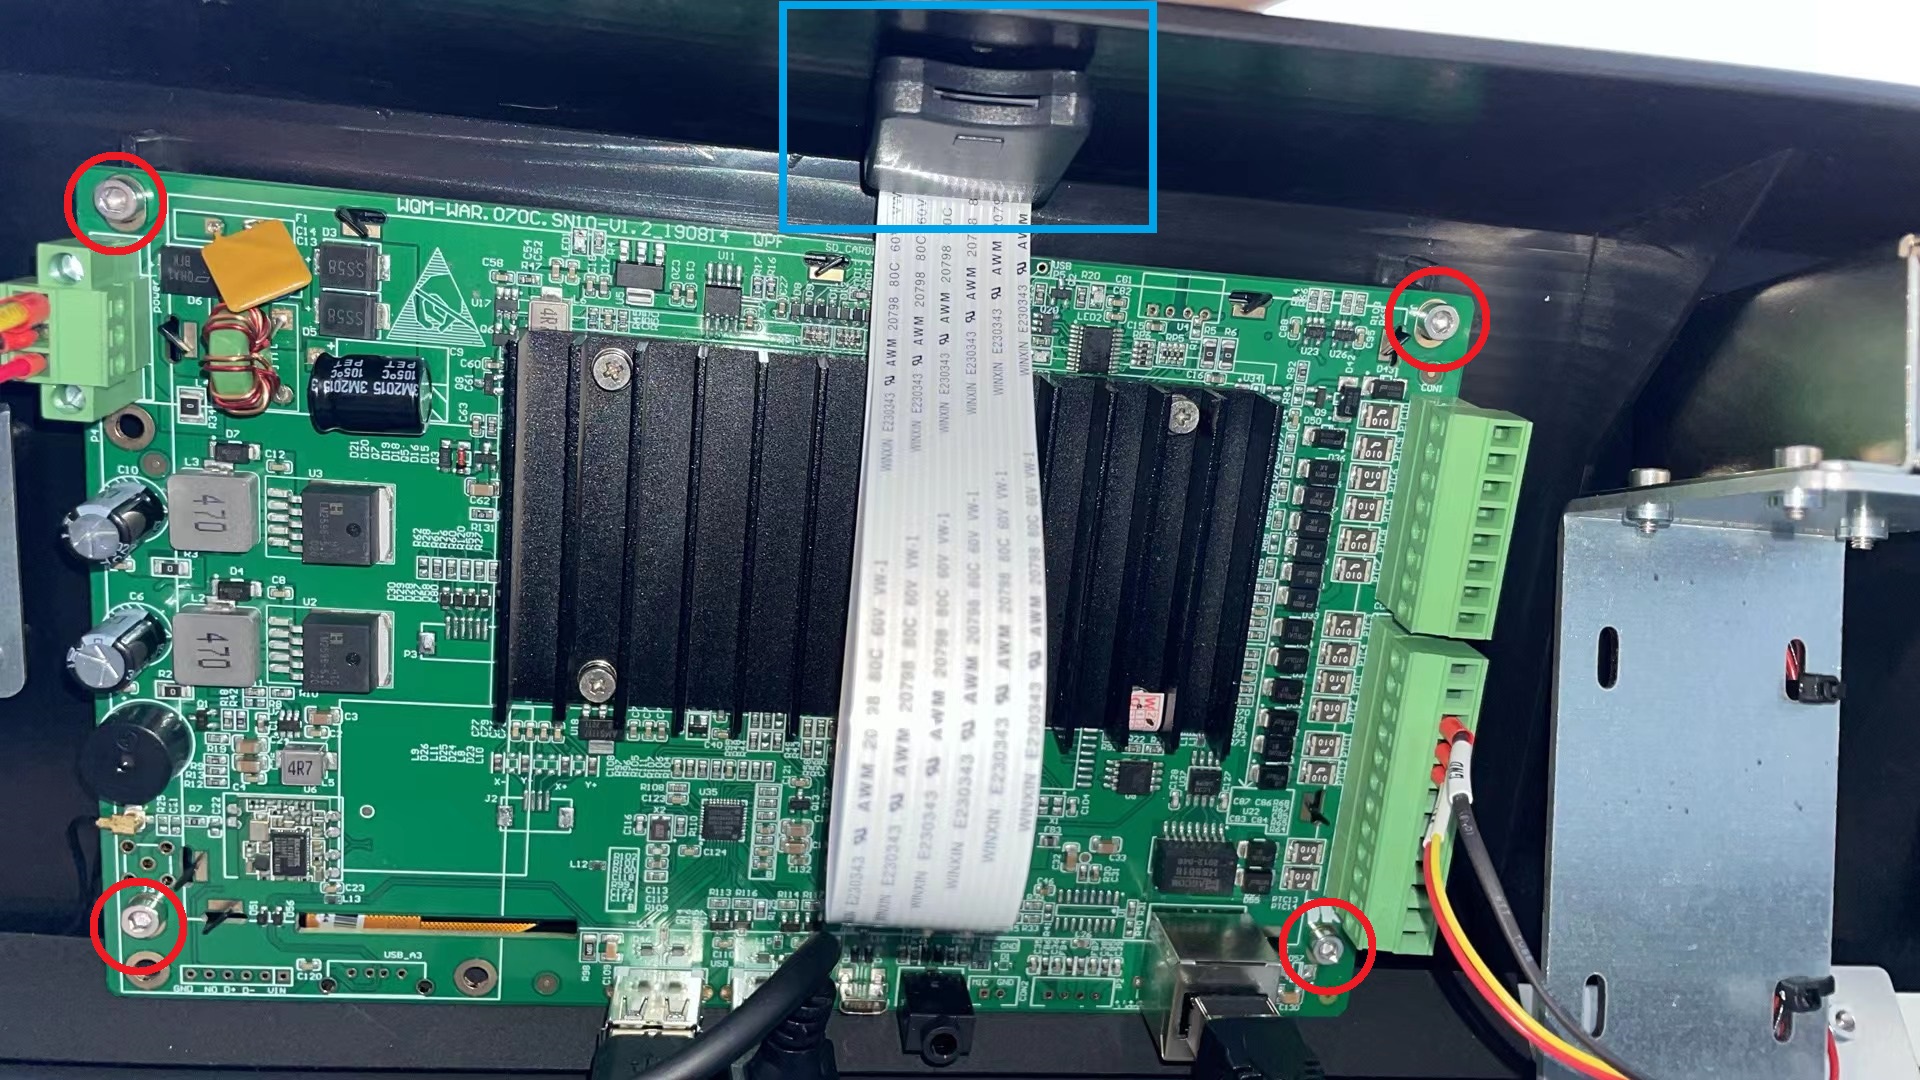
2. The touch screen is assembled together with upper computer (the PCB in Figure 1.7-2). It’s recommended to take photos before next operations. Unplug all cables, cut the ties that interferes with taking the touch screen out.
3. It is necessary to remove the TF card extension port (Blue highlighted in Figure 1.7-2), otherwise it causes interference when taking screen out. The port is stuck on the cover, use a blade or straight screw driver to remove it carefully.
4. Remove the 4 screws at 4 corners and take the screen out.

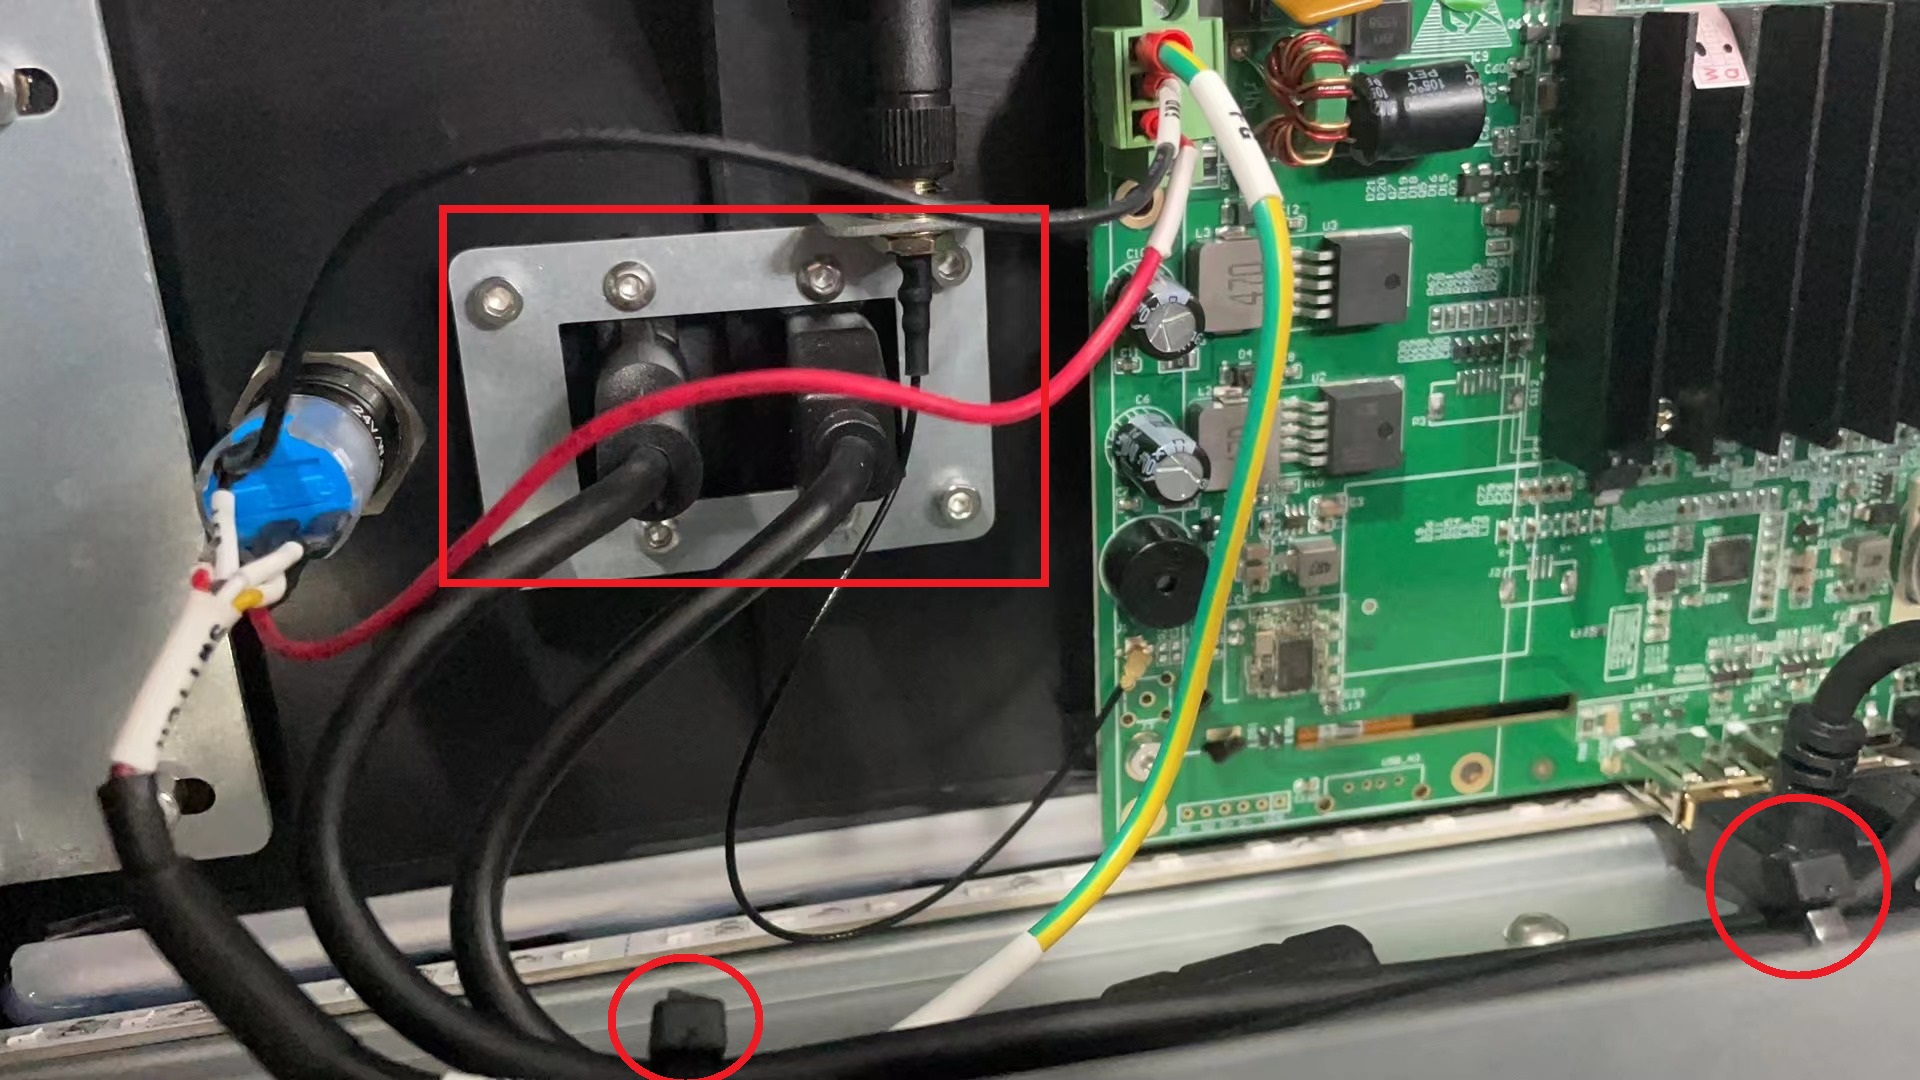
5. USB port is on the right side of upper computer. Cut the cable ties highlighted in Figure 1.7 - 3,use 2.5 mm and 2.0 mm Allen-key to remove the 8 screws on the metal fixture of USB port, and take USB port off.(the cables go to upper computer, unplug them before taking UBS port off).

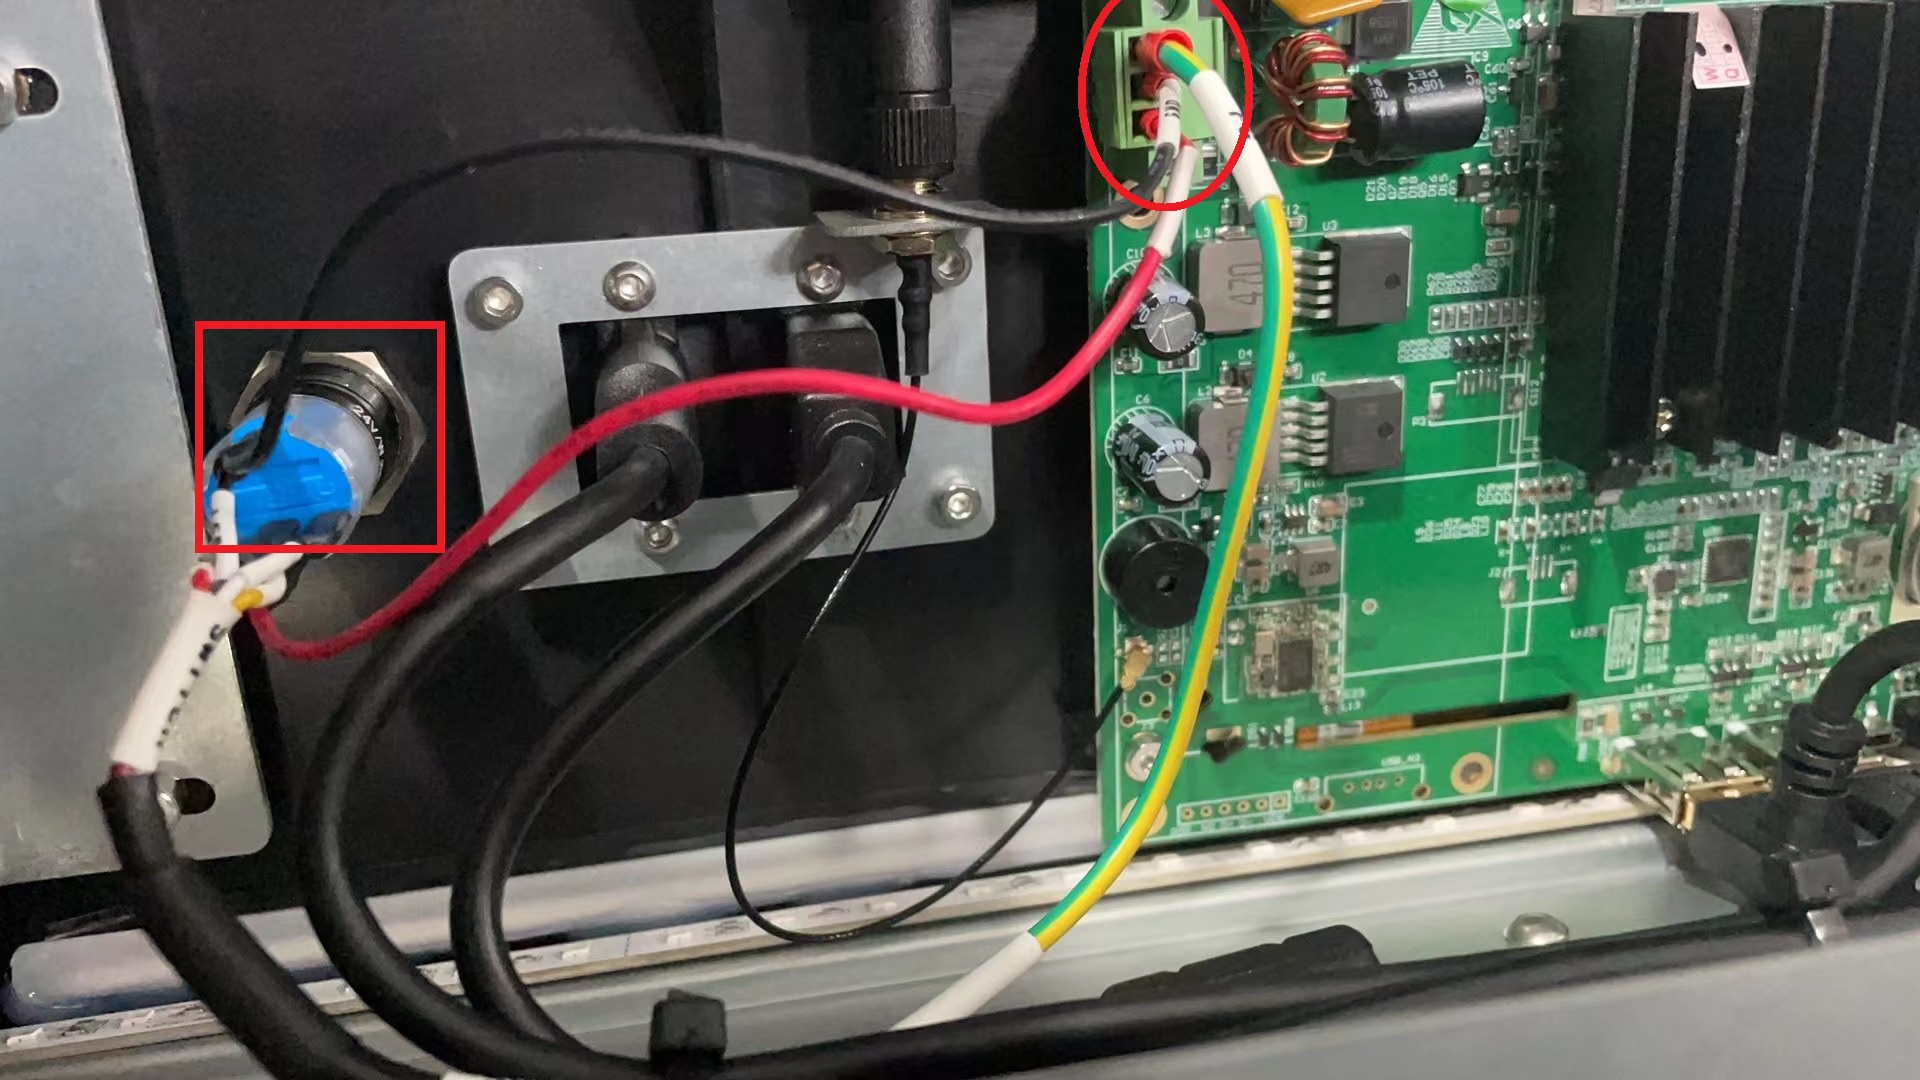
6. Startup button is beside USB port (Figure 1.7 - 4). For replacement, loosen the nut all the way to release the startup button. Then, use a straight flat screw driver to loosen the 2 screws of the plug on upper computer (highlighted in figure 1.7 -4), and unplug it. Same to use the straight flat screw driver to release the 2 screws in the plug that fixing the red and black cable, and take 2 cables out. Finally, unplug J42 on main board, cut related cable ties and take startup button out of machine.
