¶ 4.1 Z axis driving motor
1. Put a buffer in printing chamber, lower build-plate to slightly touch the buffer. (When removing Z motor, build-plate will drop down, the buffer can support build-plate at this moment)
2. Disconnect the power cable, use knob wrench (Figure 4.1 - 1) to remove the back cover.

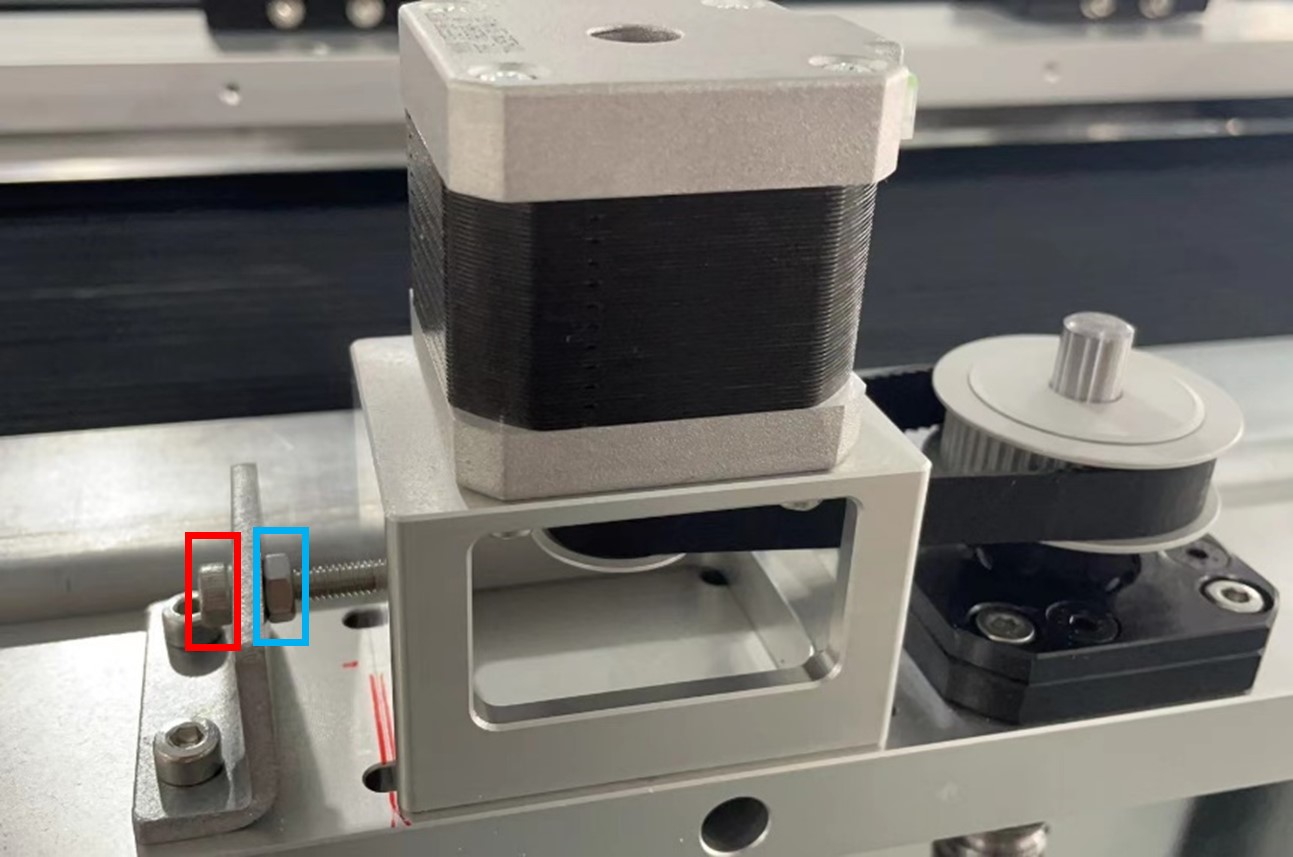
3. Disconnect the cable to Z motor. Mark the position of Z motor’s mounting (this is for the convenience of recovering the belt tension). Loosen the nut (blue highlighted in Figure 4.1 - 2) with 7mm wrench, then loosen the tension screw (red highlighted in Figure 4.1 - 2)

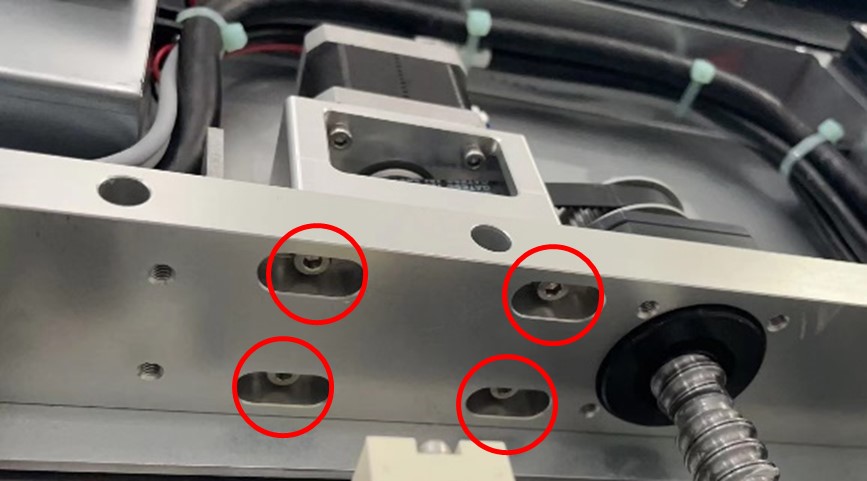
4. Remove the 4 fixing screws underneath of Z motor’s mounting with 3.0 mm Allen-Key, and take it off. Figure 4.1 - 3

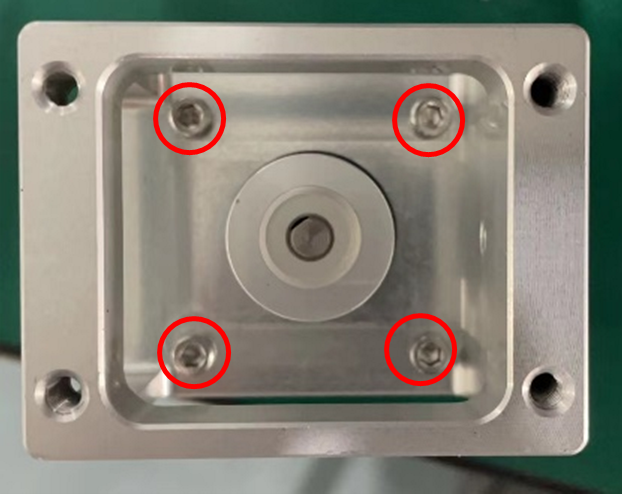
5. Then, remove 4 screws with 2.5 mm Allen-Key and separate motor from the mounting. Figure 4.1 - 4

6. If the new motor has no gear on it, remove the set screw and take the gear off the old one and put it onto the new motor.
7. When do the recovery, don’t fully tighten the 4 screws underneath the mounting, make them a bit tight as the mounting block needs to be movable for belt tension adjustment.
8. Put on the belt to gear, tighten the tension screw, and pull the mounting block to the line that marked previously. Then fully tighten the nut (Figure 4.1 - 2) and the 4 screws underneath mounting block (Figure 4.1 - 3)
9. Turn machine on, do “home-all” and remove the buffer under build-plate. Then remove build-plate all the way down and all the way up several time, check if there is noise from Z structure. If there’s noise, it’s necessary to adjust the belt tension again.
10. Print a model and check if there’s print quality issue.