¶ 3.1 Heating Cartridge(heater) & Temperature Sensor of Hot End & Nozzle
¶ Heating Cartridge(heater) & Temperature Sensor of Hot End
1. Take extruder assembly off the machine. (the cable support hot-plug)
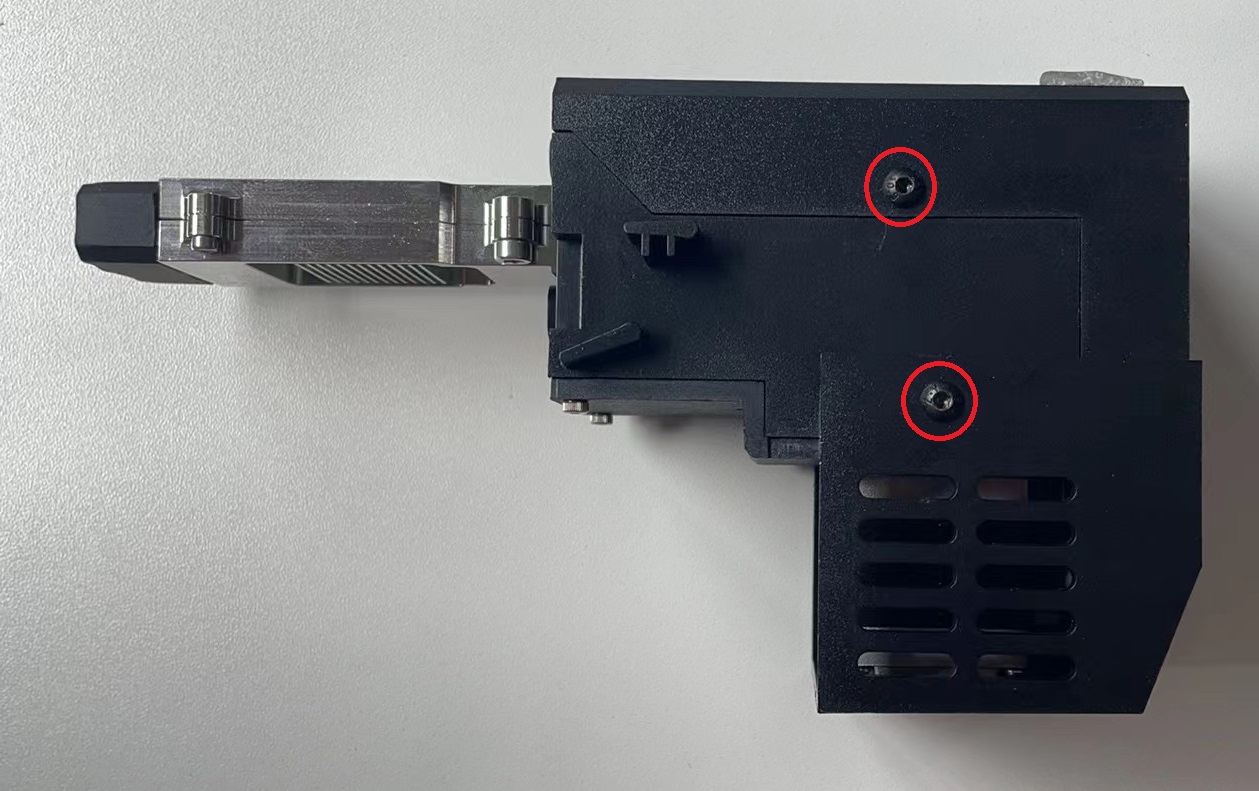
2. Remove the 4 screws on 2 sides of extruder assembly with 2.0 mm Allen-Key, and remove the black cover. Figure 3.1 - 1
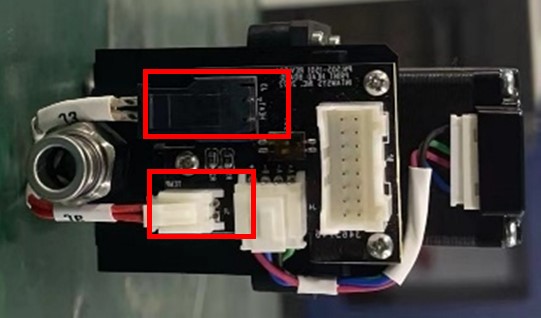
3. Unplug J1 (Temperature sensor) and J3 (Heater) on interconnection board of extruder assembly. Take the cables out of the slot. Figure 3.1-2
4. Remove 4 screws with 1.5 mm and 2.5 mm Allen-Key to remove the metal nozzle fixture. Remove the heat radiator with 1.5 mm Allen-Key. Take off the blue silicone cover around hot-end. Figure 3.1-3

5. The nozzle assembly is able to be separated with extruder assembly. Notice: it is recommended that replacing the whole nozzle assembly (including heating cartridge, thermistor, throat, hotend, radiator, Figure 3.1-4). Because of the design of radiator, the cable lugs of heating cartridge and temp sensor are separated against the connector. If they were not well installed, there would be high risks to have issues.

¶ Replacing heating cartridge separately (not recommended)
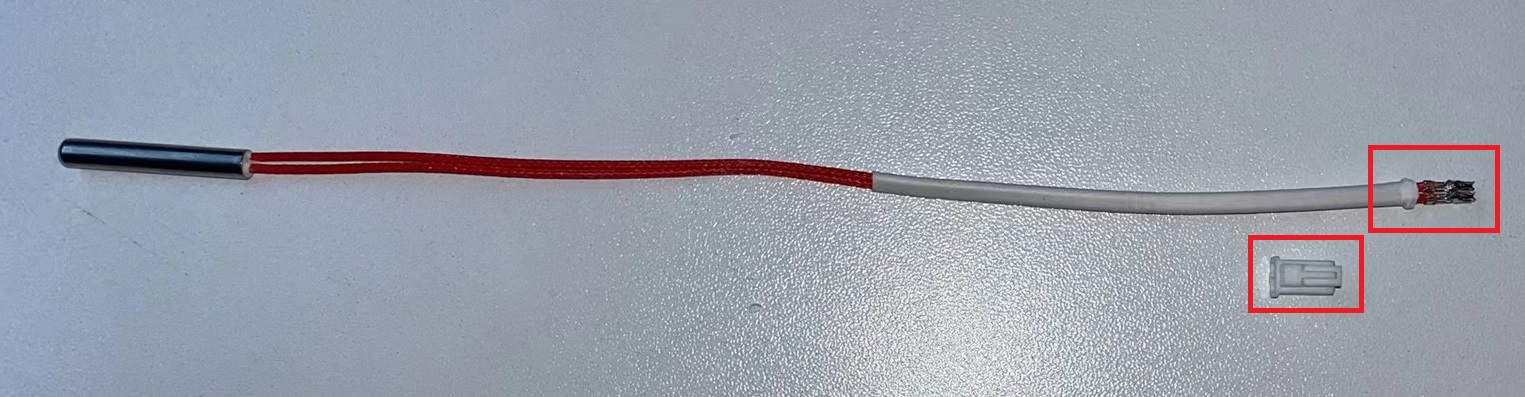
The presence of the cooling radiator and the plug of heating cartridge makes it impossible to pull the heating cartridge up or down after loosening the grub screw that fixing the heating cartridge. Therefore, if heating cartridge is going to be replaced separately, it is necessary cut its cable and then pull it out (or use a tool to pull out the cable off the plug, see Figure 3.1-6). The new heating cartridge cable and plug are separate, insert it and tighten the grub screw first, then insert the lugs of cable into the plug (Figure 3.1-7). Note: the lugs must be well installed, and the cable cannot be easily pulled out by hand; if not installed correctly, it may cause circuit issues. Therefore, it is recommended to replace the whole nozzle assembly to avoid any risks.


|

|
¶ Replacing temp sensor separately (not recommended)
It is similar to replacing heating cartridge. Install the lugs into plug after inserting temp sensor into hot-end.
¶ Nozzle
The procedure of nozzle replacement is as follows:
1. take off the silicon cover of hot-end when nozzle is cold.
2. Click the "Material" button on the main interface to enter the Material interface.
3. If there is still material in the nozzle, click the "Unload" button first to unload the filament according to the prompts.
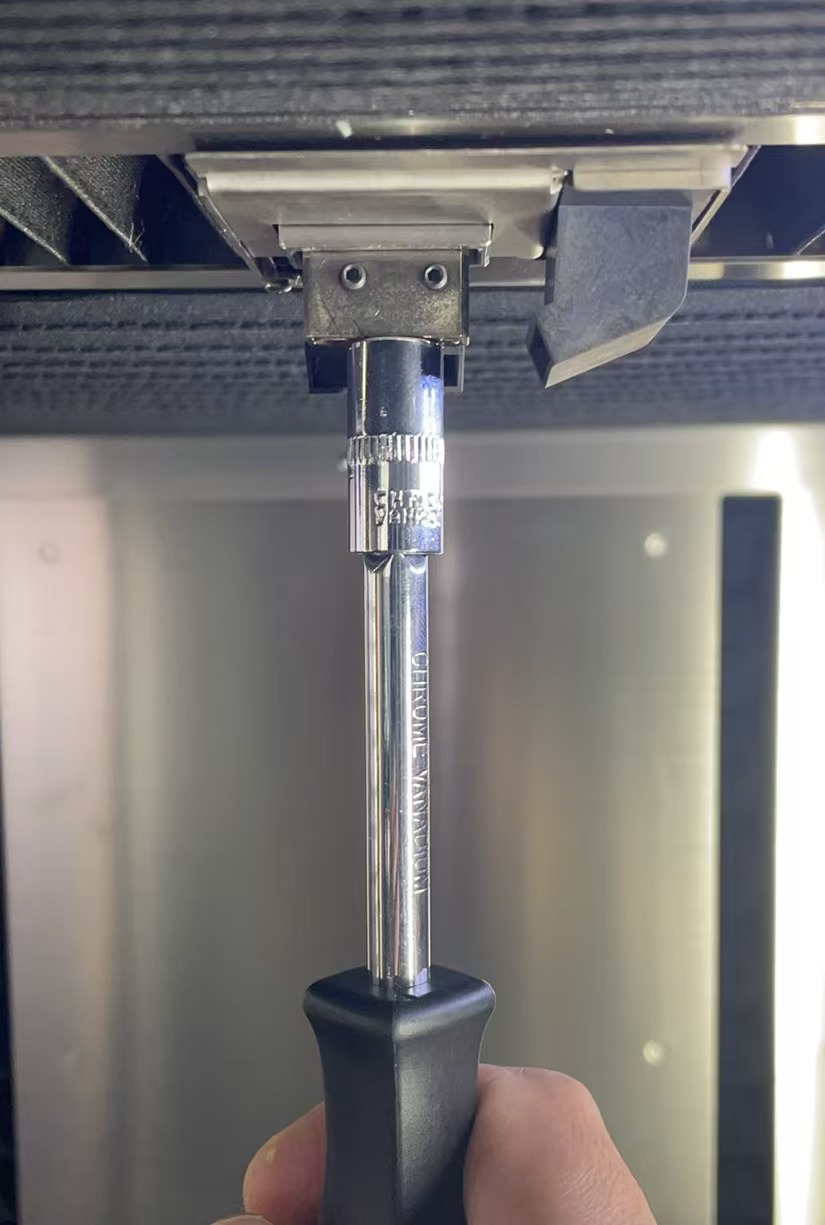
4. Click "Target Temperature" and set it to the extrusion temperature of the material. After confirmation, the nozzle will be automatically heated to the target temperature. Remove the nozzle with a 7 mm socket wrench.
5. Take out the high-temperature nozzle in the socket with tweezers, replace it with a new one and install it on the extruder.
6. After replacing the nozzle, hotbed leveling, XY offset are recommended.