¶ 4.2 X motor
1. Refer to the contents of Section 1.7, unplug all cables on touch screen (upper computer), release USB port and startup button, cut all cables ties that have interference with lifting top surrounding cover. (We need to remove the top surrounding cover to have enough space to do operations on X motor)
2. Refer to the contents of Section 1.6 to remove all the screws fixing the top surrounding cover, and remove it.
3. X motor is at the right side of machine. Mark the position of mounting block in advance. (For recovery, make the tension of belt similar to previous)
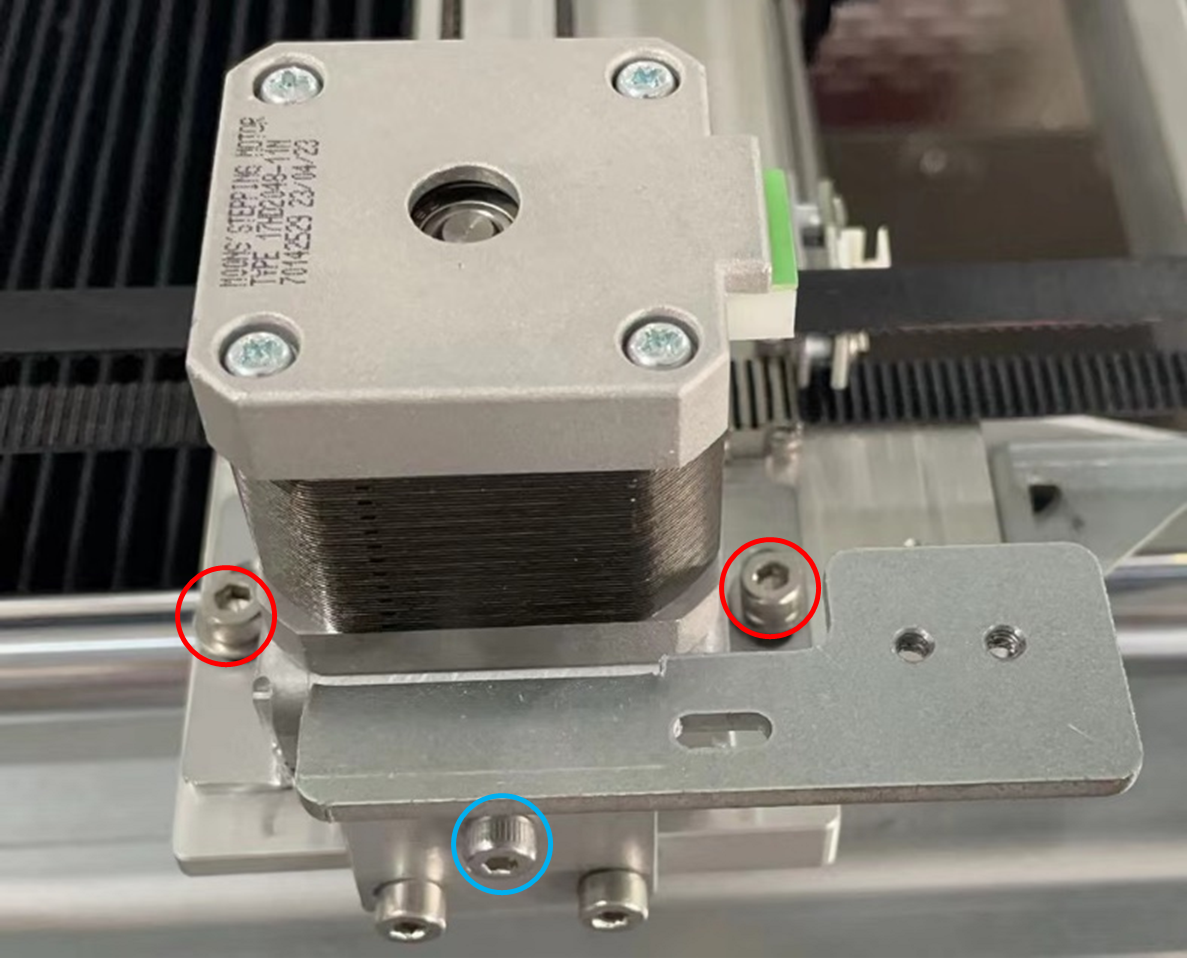
4. Remove the tension screw (blue highlighted in Figure 4.2-1), and remove 2 screws (red highlighted in Figure 4.2-1) fixing the mounting block of motor. Then, take the motor with mounting off.
5. Remove 4 screws and separate motor from mounting block. Loosen the set screw, take the gear off and put it onto new motor if the new one has no gear.
6. When to do the recovery, pull the mounting block to the marked position. It’s better to have a tension meter on-site. Adjust tension to 35-40N (move the extruder assembly left and right for each adjustment before measuring the tension), then tighten the screws of mounting block. Contact with INTAMSYS service team for details.
Or, you can use an app on Apple phone called "Fine Tuner" (Figure 4.2-2) to test the Hertz value generated by manually flicking the belt (Figure 4.2-3, this test needs to be conducted in a very quiet environment, otherwise it will be interfered by other sound sources). The following provides a range of Hertz values for reference:
| Model | Axis | Range |
| FUNMAT PRO 310 | X | 70 - 78 HZ |
| Y | 50 - 55 HZ |

|

|
If the frequency value is outside the recommended range, please try to adjust the tension of the belt again.