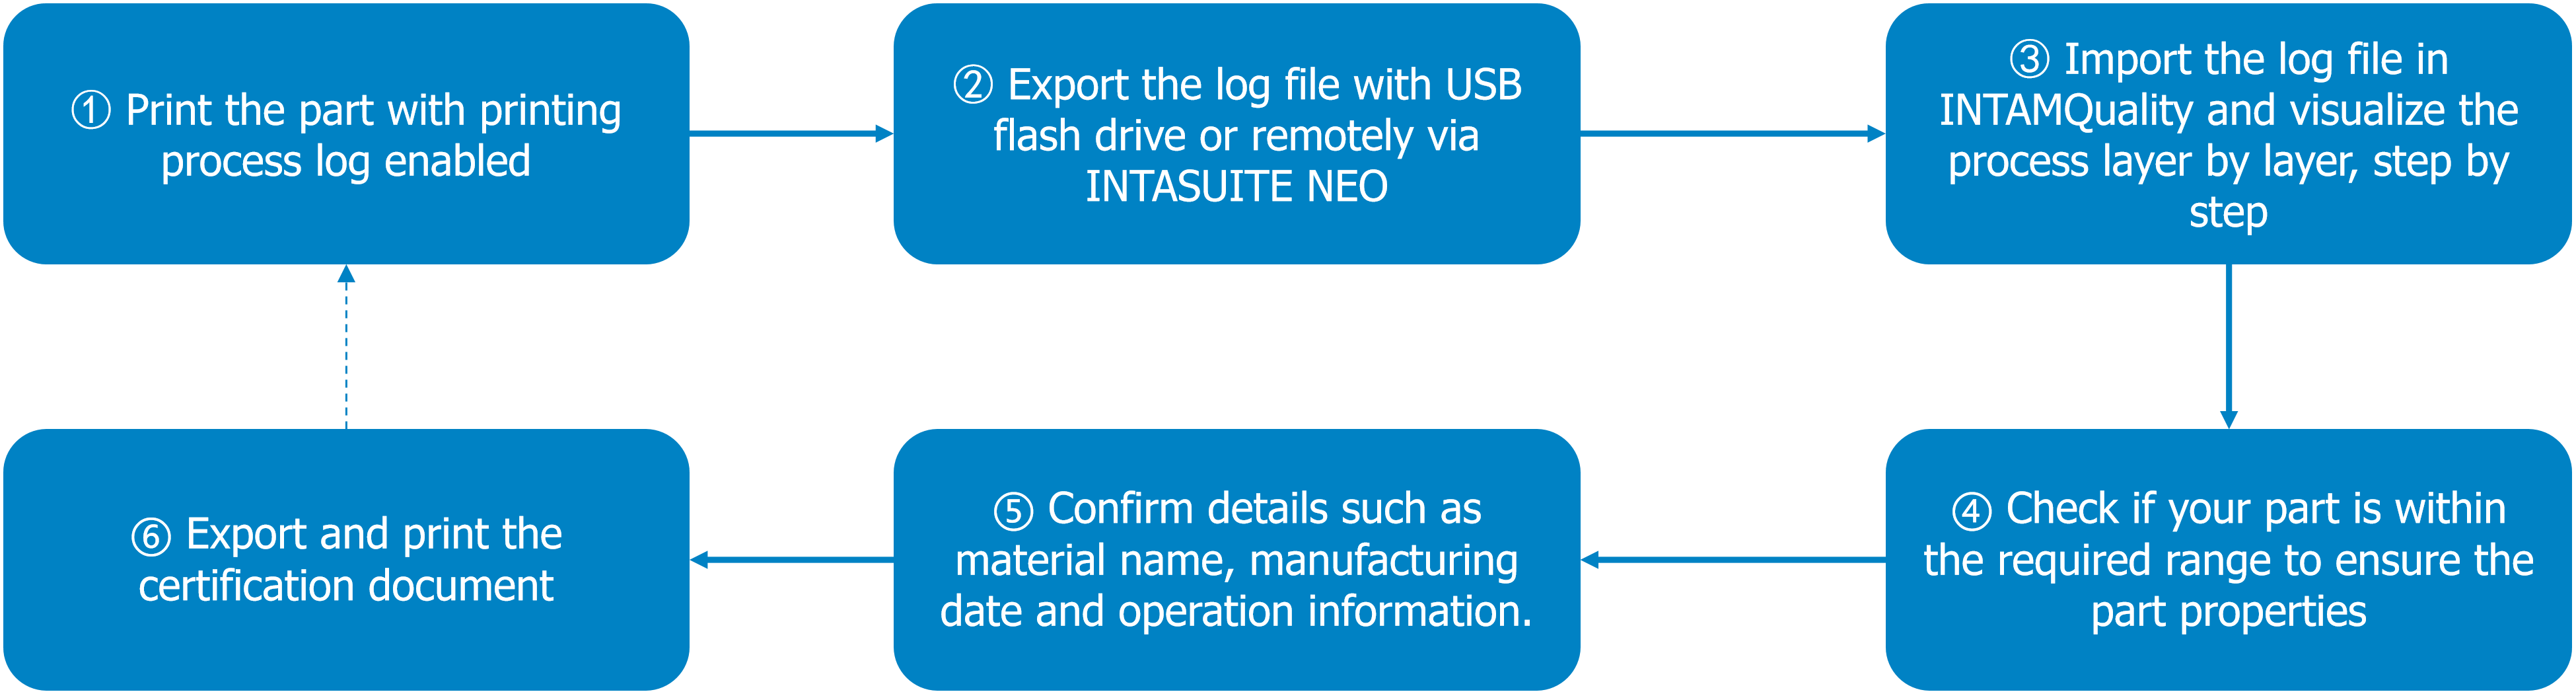
¶ Work on printer side
Step1:Please make sure the software and firmware of your 610HT to PRO610SW_HT_V1.2.8.13T1.tar (or newer) and FUNMAT_PRO_610_V1.1.5.7T.hex (or newer) respectively.
- You can download them HERE.
- There are no specific requirements for the order of upgrading software or firmware.
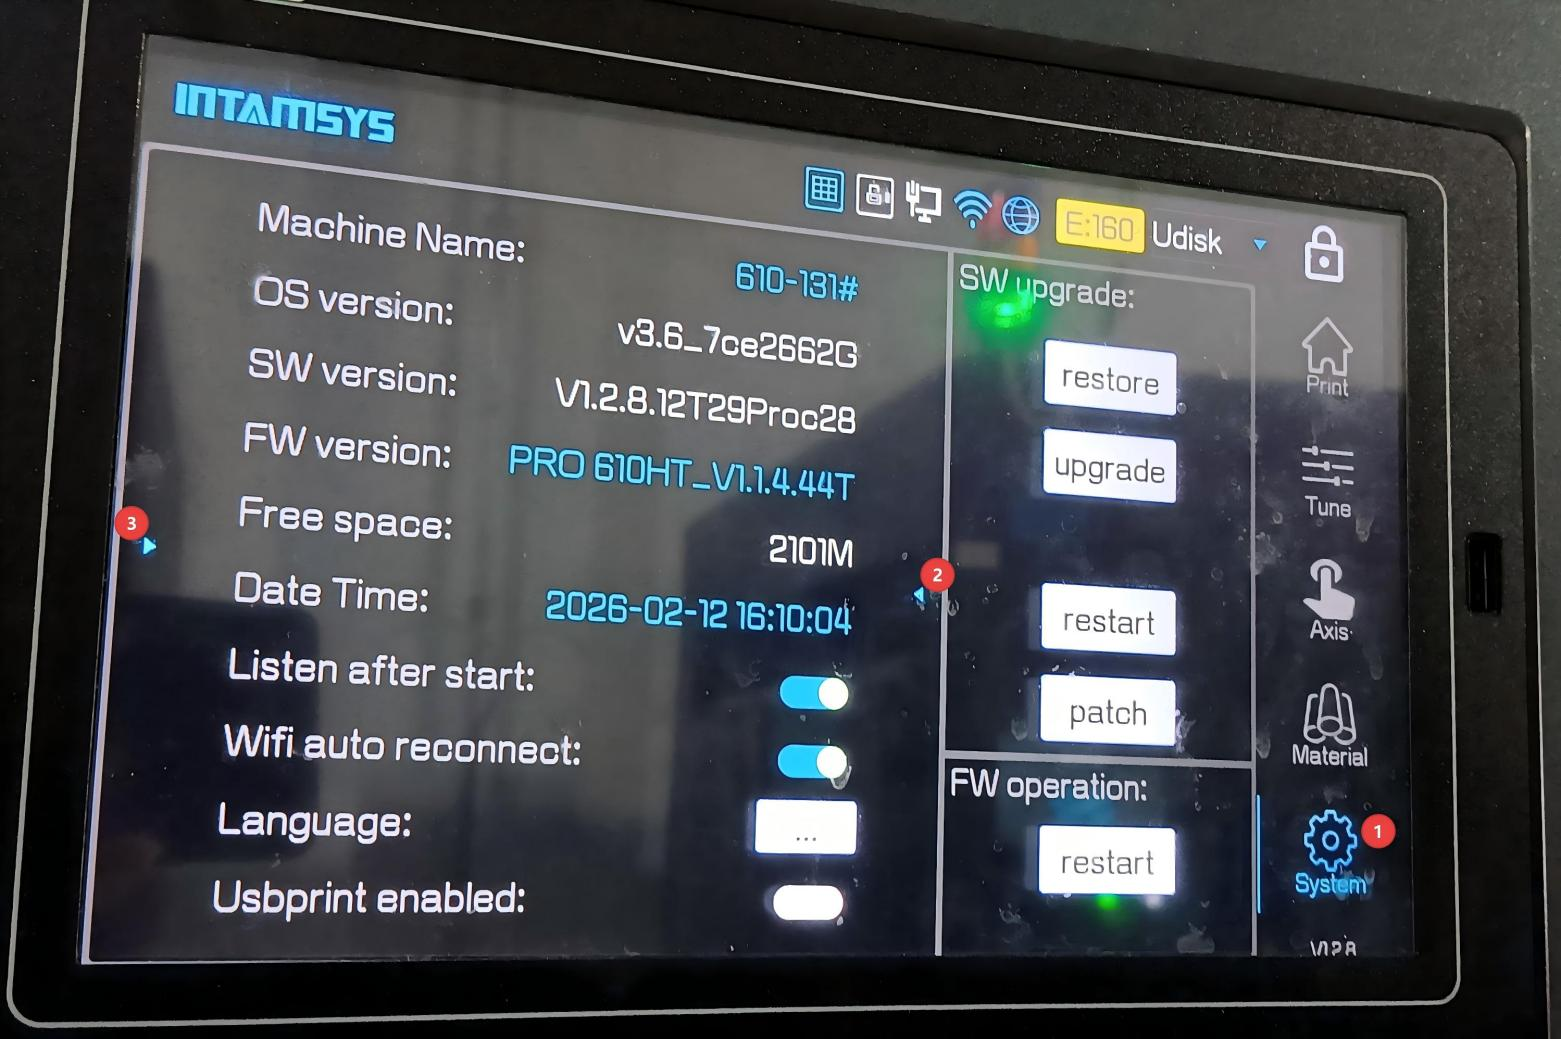
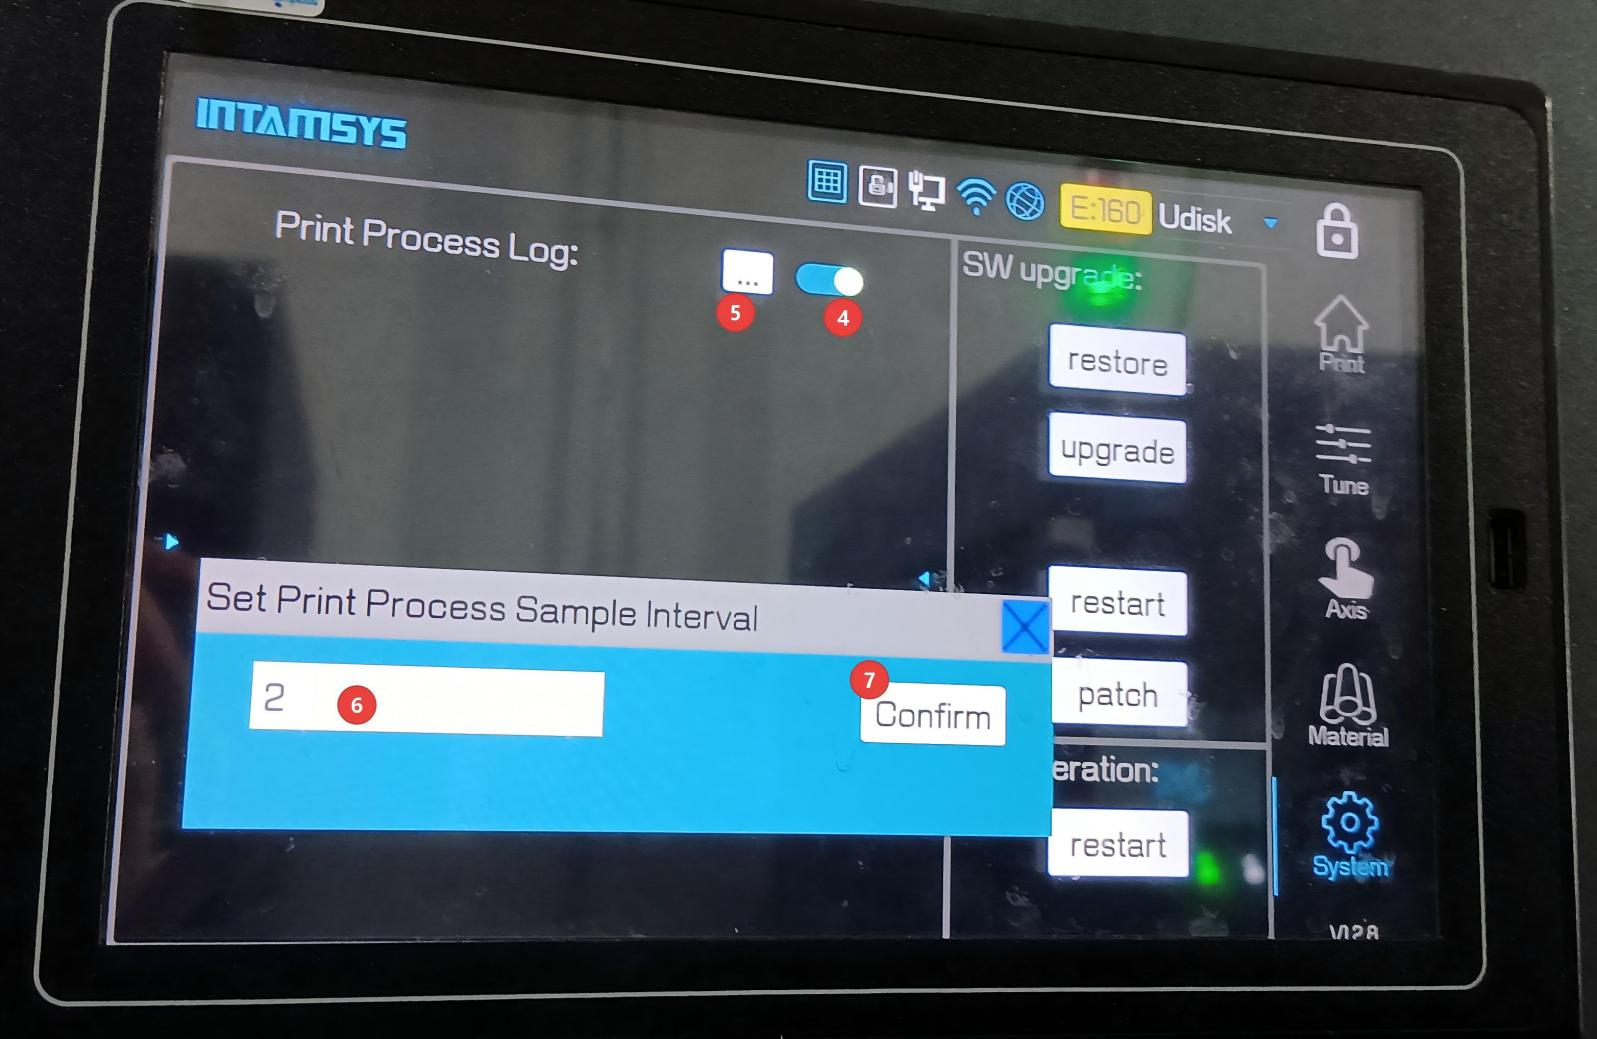
Step2: Before printing, please go to System Settings and enable the “Print Process Log” option. The default data collection interval is set to 2 seconds, which means that all sensor data will be captured and saved into the specified log file every 2 seconds.
Step3:Before printing, you need finish encoder calibration firstly, please refer to the guidance EncoderCalibrationUserGuide.pdf.
Step4:Start to print as normal.
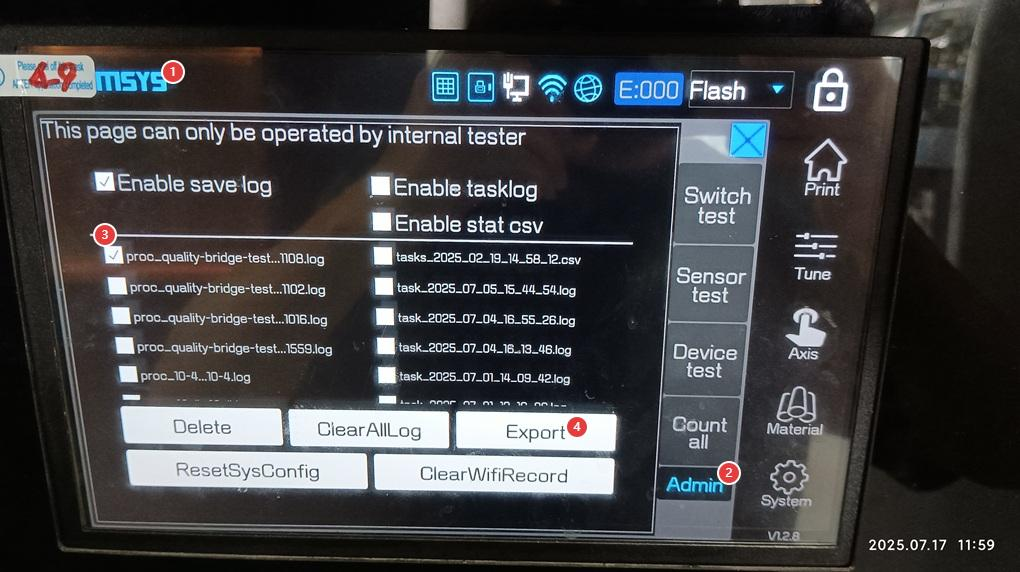
Step5:Once print job is completed, insert a USB flash drive, and export the print process log file.
① Long-press the ITTAMSYS logo on the screen.
② Click on Admin setting.
③ Select the relevant log file with prefix "proc".
④ Press Export command to save the log into USB flash drive
And you can also leverage INTAMSUITE NEO or INTAMSUITE Local Print to download the log file remotely via local area network (LAN).
¶ Work on INTAMQuality client side
Step1:Download the latest INTAMQuality build and install it on your computer with Windows 10/11 OS.
Step2: Launch INTAMQuality and import you license.
- How to get the license for your INTAMQuality?
- INTAMQuality™ can only read log files generated by authorized printers. Each machine requires a corresponding license file, which must be imported into INTAMQuality™ in advance on a one‑to‑one basis.
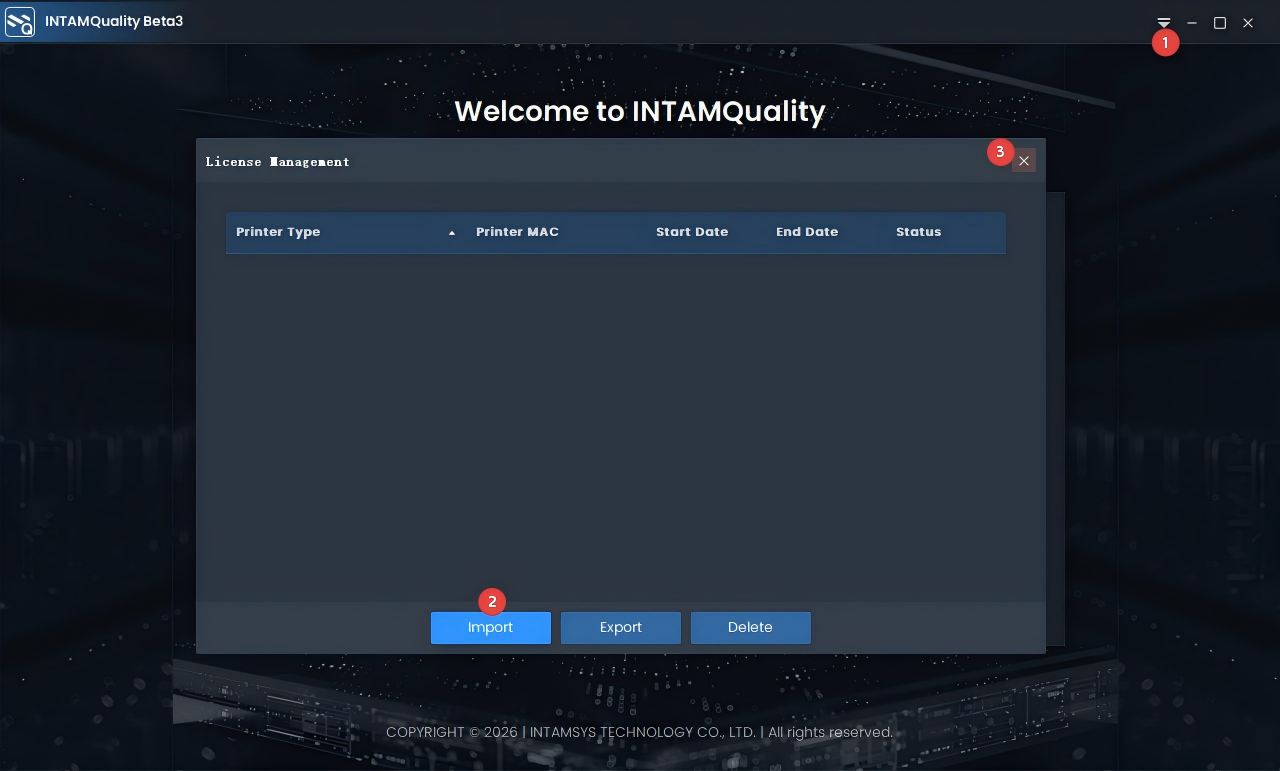
Step3:Copy the print process log file to your computer, or you can use the sample file we provide.
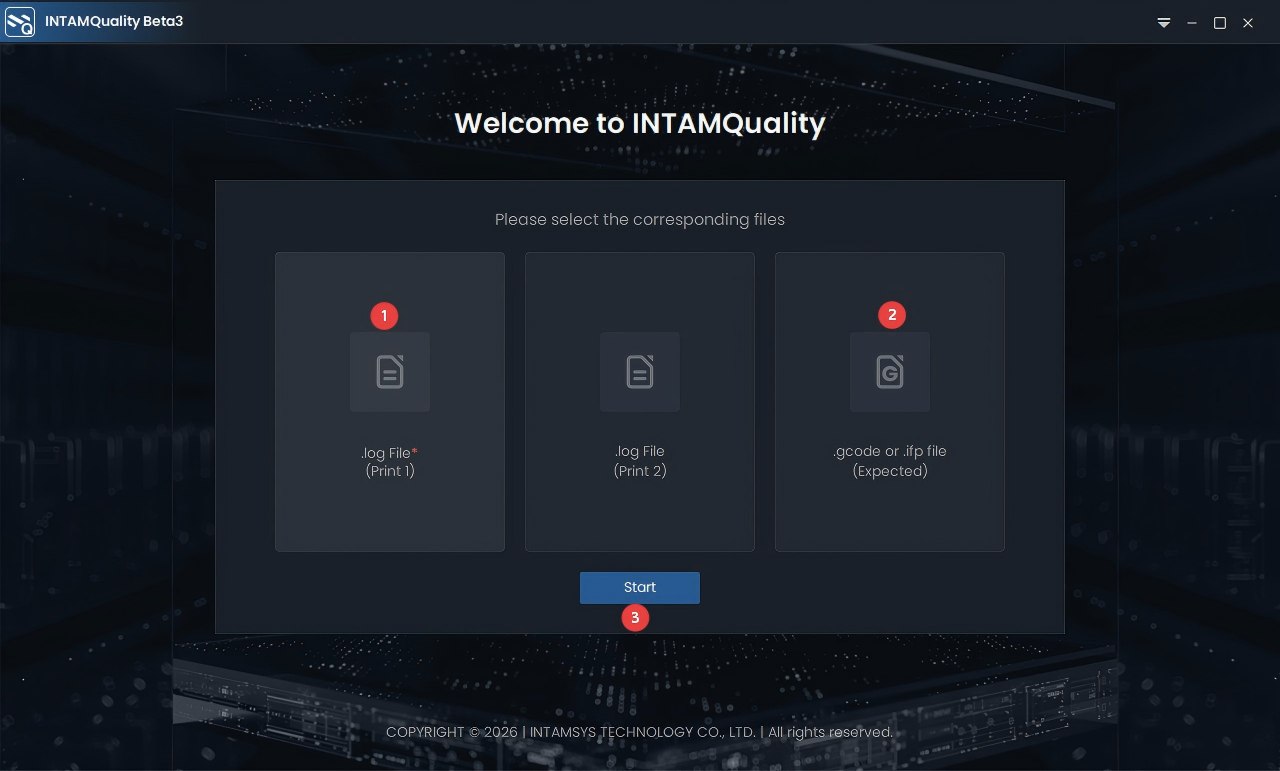
Step4:Select and import one log file at least.
- If you would like to visualize the 3D preview of print path, please select the relevant Gcode file as well.
- If you want to evaluate the deviation between two prints, please select one more log file.
Step4:Here are simple introduction on major functions.
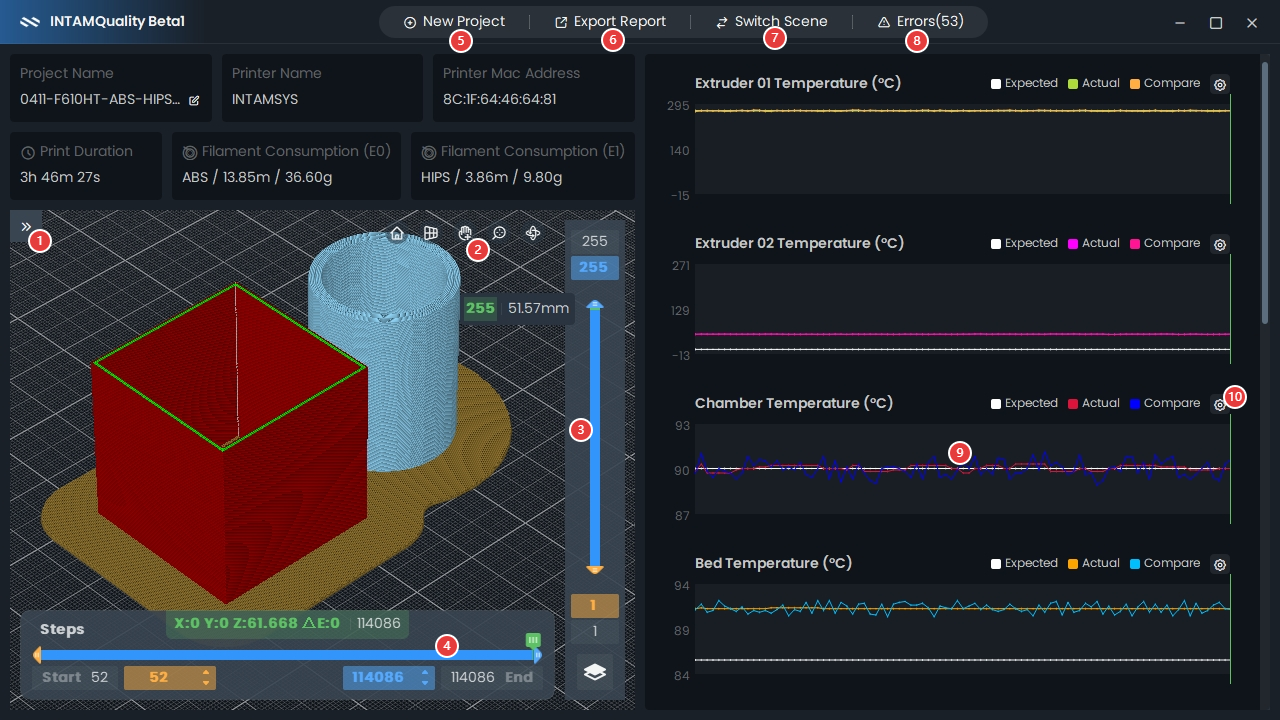
① Expand or collapse the visibility control on print path preview. Visit here for more details.
② Canvas view operation like switching perspective / orthographic view.
③ Layer controller - visit here for more details.
④ Step controller - visit here for more details.
⑤ Create another project and replace current one.
⑥ Export quality evaluation report (.docx) with pre-defined teamplate.
⑦ Switch between 2 scenes as you like.
⑧ Check out errors in details during pirinting.
⑨ Sensor data graph over time, supporting zooming.
⑩ Set upper and lower limit for each graph.